The Periods section of the application has been more or less completed.
Here is my current academic paper
The Periods section of the application has been more or less completed.
Here is my current academic paper
In Ireland, relationships and sexuality education (RSE) is a module within Social Personal and Health Education, which has, since 2003, been a compulsory part of the Junior Cycle (students aged 12–16) curriculum. This is where students receive the majority of their Sex Education. The current curriculum has been in place since 1999 and is in dire need of an update. Legislation allows schools in Ireland to influence the ethos of how Sex education is being taught. As most schools in Ireland are run by the Catholic Church, there is a lack of teaching of topic with relation to LGBTQ relationships, gender identity, consent and sexual orientation. (Kelly, 2019)
For Primary schools in Ireland it is not compulsory for them to teach RSE and when we look at the statistics that show children are developing much faster than they did a century ago, it creates an issue. Some Girls are getting their periods before they are getting an education about them. There is no standardised SRE curriculum for primary schools, therefore the quality of a typical primary school child’s education about puberty is hard to predict.
“Currently, children are taught about puberty when aged about 11. Yet, the onset of puberty – which used to occur at 17 in the 17th century, and 15 a century ago – has now dropped to nine or 10.” (Kirk, 2017)
![]()
The HSE provide Primary schools with a programme, called ‘Busy Bodies’. This is usually introduced around 5th and 6th class. The programme entails a booklet and a DVD dealing with all of the physical and emotional changes that children may experience during puberty. The main aim of the resource is to reassure children that puberty is a normal part of growing up and the booklet is designed to be used after the pupils have watched the ‘Busy Bodies’ DVD.
Unfortunately, there are some issues with the content in the booklet. The book is very limited to what Consent is. It explains consent as the age that you are legally old enough to have sex. In the booklet it states “It is not a good thing for people to have sex before they are grown up and ready for it. And for this reason, the law protects you from feeling any pressure about this, by making it illegal for anyone to have sex with a young person under 17. This means that you are not legally old enough to agree to (or consent to) having sex until you are at least 17.” (Busy Bodies, 2008).
It is implying that consent only happens when you are under the age of 17 when in fact consent is something we experience at every age with any person, not someone who is just “older”. It can be something as little as giving someone permission to hold your hand or touch your face. Every child must know they are entitled to their own say when it comes to people touching their bodies, if they feel uncomfortable they must know they can speak up.
Another issue within Busy Bodies is the difference in how the changes for boys compared to girls is portrayed. The booklet describes erections as something that happens when boys become sexually excited resulting in the penis becoming harder and bigger. But when describing what the clitoris is for girls, there is no mention of “sexual excitement” or how the clitoris becomes larger, the same as a penis when girls are sexually excited. The booklet only states the clitoris as a “Fleshy bump near the urethra”. It describes erections for girls are easier to hide because they are “internal”. This is in no way a clear explanation to what happens to girls bodies. It’s as if girls need to feel ashamed of feeling any sexual desire. To make the idea of puberty even worse for girls the booklet says the one thing girls can be excited for is “Coping with Periods” Boys can get excited which leads to sexual feelings, but girls get to be excited about period pain? When Talking about sex, there is no mention of consent or sexual feelings all that’s needed for sex to take place is for a man’s penis to be erect and then for him to simply put it into a woman’s vagina.
“There is a hidden bias in this booklet that is sexist. Men can be sexual beings for pleasure, and sex happens when a man is actively sexually stimulated. Women are ‘excited’ to be fertile (get their periods), and to have sex, no physical change is apparently needed in their body.” (Woods, 2018)
Although the booklet provides the children with information on the changes to the body and sex with explaining how babies are made, it can not be the sole responsibility of the school to ensure children are getting the full education they need with regards to their bodies. Children should feel comfortable coming home to ask questions and get the answers they desire with someone they trust such as a parent or older sibling according to their values and beliefs.
There is a stigma in Irish homes when openly talking about Sex and it seems to be the Irish mentality that the school will take care of it. But if some schools aren’t talking about it until the Junior Cycle at the ages of 12-16, this leaves it too late for young people if there are no conversations on the topic at home. All it takes is one episode of The Simpsons for a child to see that Sex in media is clearly visible and easily accessible. Tv, internet and magazines have been increasingly sexualised over the past decade. Even with this change in our society it still leaves parents cringing at the thought of sitting their child down and talking about Puberty and Sex. It is not fair on young people today who are not receiving the information needed to feel comfortable and confident in their bodies.
“Being unable to fully comprehend the hormonal and emotional changes that are part and parcel of puberty, or what it can mean for them on a reproductive level, can have profound repercussions. It is perhaps no surprise that early puberty is linked to emotional and behavioural problems, as well as significant health issues such as an increased risk of diabetes, heart disease and other cardiovascular diseases, as well as cancer, later in life.” (Kirk, 2017)
It is alarming to hear the consequences of not getting a proper education on Puberty and Sex. With the help of schools and parents, the development of an app such as Let’s Talk can be a step in the right direction for this problem.
References
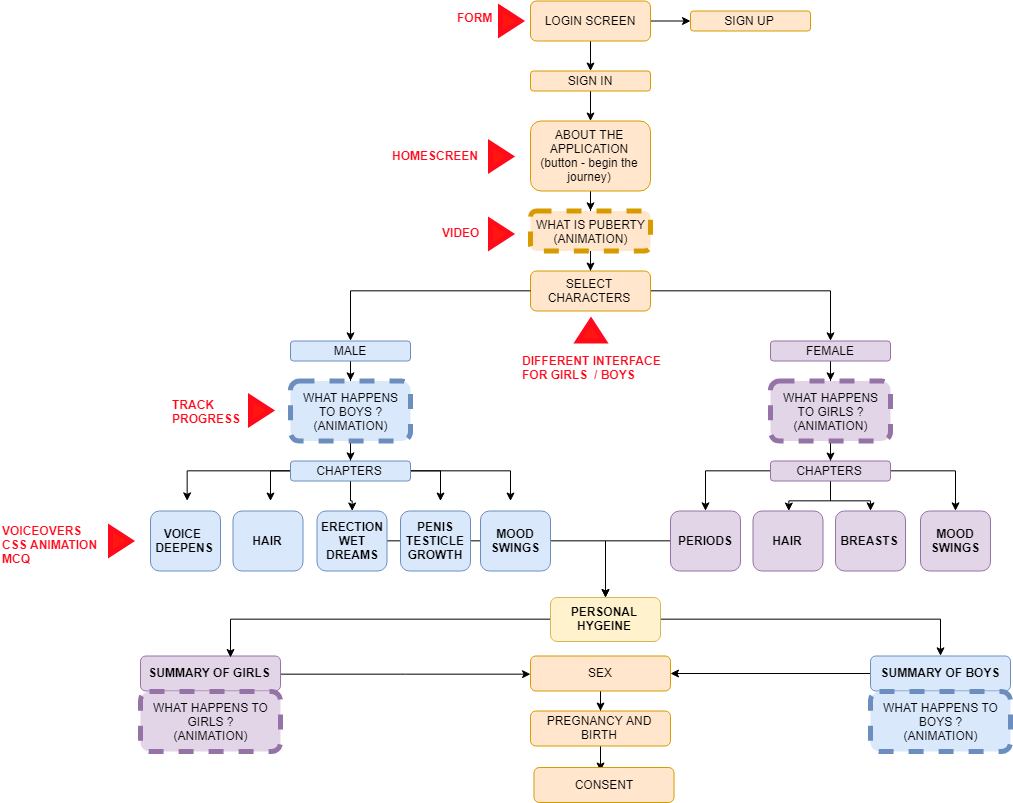
To properly determine the points of interaction within the system it was necessary to examine the system as a whole. By analyzing the system as a whole, it is possible to understand the areas of the application that will require user interaction, and define these points. A flowchart was created to represent the pages in the application. This will be useful during the development of the application as it will allow recognition of parts of the system that will be reuable and parts of the system that require unique scripts.
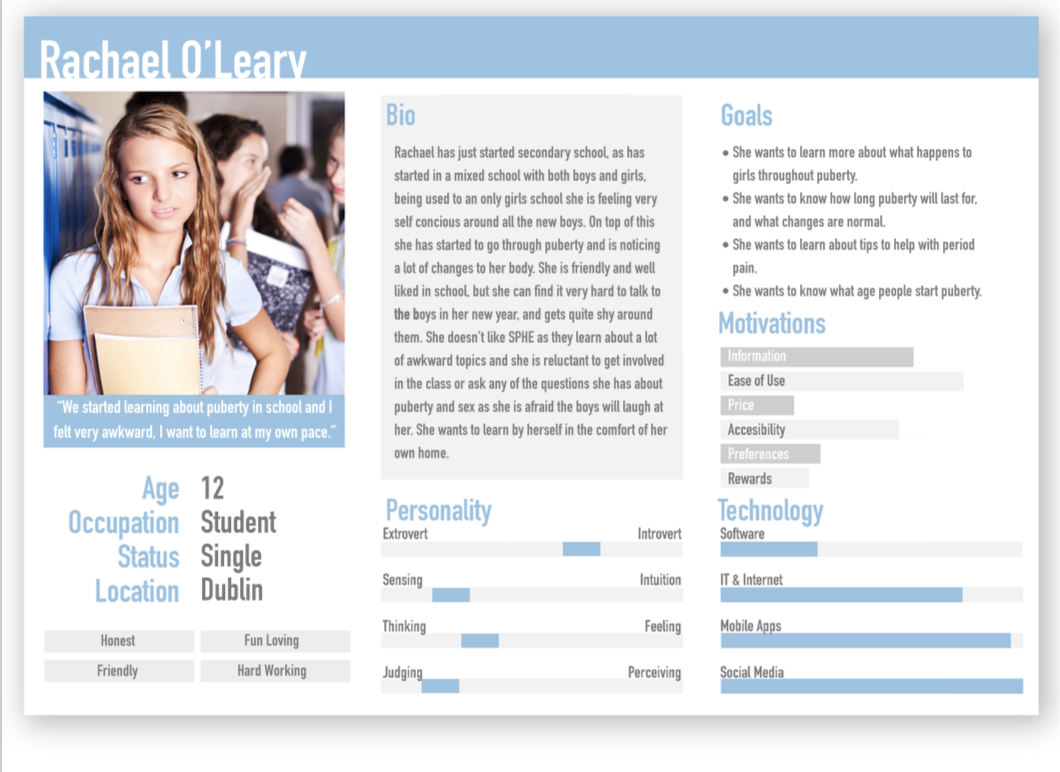
“Personas are fictional characters, which you create based upon your research in order to represent the different user types that might use your service, product, site, or brand in a similar way. Creating personas will help you to understand your users’ needs, experiences, behaviours and goals.” ( Dam, Siang, 2019)
Personas are a vital aspect in the development phase of a user interface (UI) as user needs are at the forefront of the design decisions made when creating the interface. Persona’s outline the user’s goals and capabilities when using the application. Once personas are developed it is important to define scenarios in order to prioritize features of the application in the development phase. Persona and scenarios offer an inexpensive option when analysing the proposed UI.
By placing emphasis on the expectations of the user through the use of personas and scenarios optimal placement of content can be achieved which support the aim of the project. This allows for the development of a successful and user friendly UI. “Personas help product development teams arrive at design solutions that better address the needs and preferences of all audience segments. Personas offer insights that can lead to improved functionality and a better experience for both industrial design as well as interface design.” (Liquid Agency , 2014)
Initial research was carried out into the target audience and intended end user of “Let’s Talk” when developing the personas for the project. In depth research was carried out in order to collect as much knowledge possible about the intended end user to create an accurate representation of the user when developing personas for the application. Detailed descriptions of the end user were then developed. Following the development of the personas, scenarios were created in order to outline the possible solutions the application can provide by creating real life scenarios that feature the persona in the role of the user.

References
Liquid Agency (2014), Five Reasons why Personas Matter, viewed 01/04/2019 via <https://medium.com/brand-experience/five-reasons-why-personas-matter-54db192f38b6>
Rikke Dam, Teo Siang (2019), Personas – A simple introduction, viewed 01/04/2019 via <https://www.interaction-design.org/literature/article/personas-why-and-how-you-should-use-them>
From taking the modules ‘Animation Principles’ and ‘Advanced Animation’ I have acquired the fundamental skills to create animated videos for the Let’s Talk app. Having these skills allowed me to take the role as Animator for the scenarios.
“Animation as an art, an approach, an aesthetic and an application informs many aspects of visual culture, from feature-length films to prime-time sitcoms, from television and web cartoons to display functions on a range of new communications technologies” (Wells, 2002)
(Redman, 2018)
Understanding the way people and objects move is a very important skill to have when being an animator. Also developing a good sense of timing is very important to become a good animator. (Maestri, 2006, p.105)
A character moves their body for a reason, and these motions are very important because they convey the characters mood and personality to the audience. “Only through motion can the character truly come to life.” (Maestri, 2006, p.105)
Motion is the result of a force acting on an object. The force of gravity pulls objects to the ground but there are other ways that effects the way a character moves which include wind, the weight of the object or the forces exerted by the characters own muscles. The fact that muscles apply force is an important concept. Muscles work the same as gravity as they can cause objects in the case of animation, the characters limbs to accelerate and decelerate. (Maestri, 2006, p.106 p.107)
When animating the characters in a realistic way having a good understating of how the human body moves is key. When animating the scenarios for the app keeping the following in mind will become very useful:
Timing: As an animator, by using timing allows you to guide the audiences eyes through the characters actions.
Arcs and Natural Motion: Objects usually move along arcs. This is because objects are usually subject to many different forces. In the case of animation, characters arcs are also created by the natural mechanics of the human body. Joints move by rotation and this creates arcs. Animating joints they use forward kinematics, they move by rotation. These rotations automatically move the characters joints along an arc. This movement gives a natural look to the character.

Squash and Stretch: Most objects tend to flex and bend when they move. Because objects can change shape when forces are applied these idea is helpful when animating. For character animation there are levels of squash and stretch. With a realistic character the effect of squash and stretch can be less dramatic. But in a more cartoony environment the squash and stretch can be more rubbery.
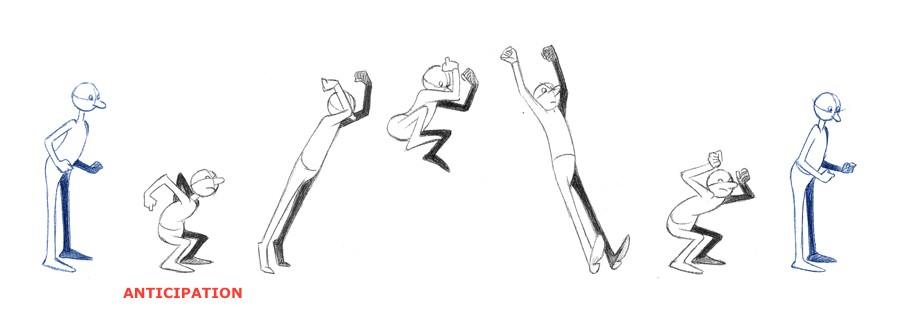
Anticipation: It is the body’s natural way of gaining momentum before an action takes place. In animation by exaggerating it, we can keep the viewers attention and achieve better timing.
(Maestri, 2006, p.117 p.118 p.123 p.127)
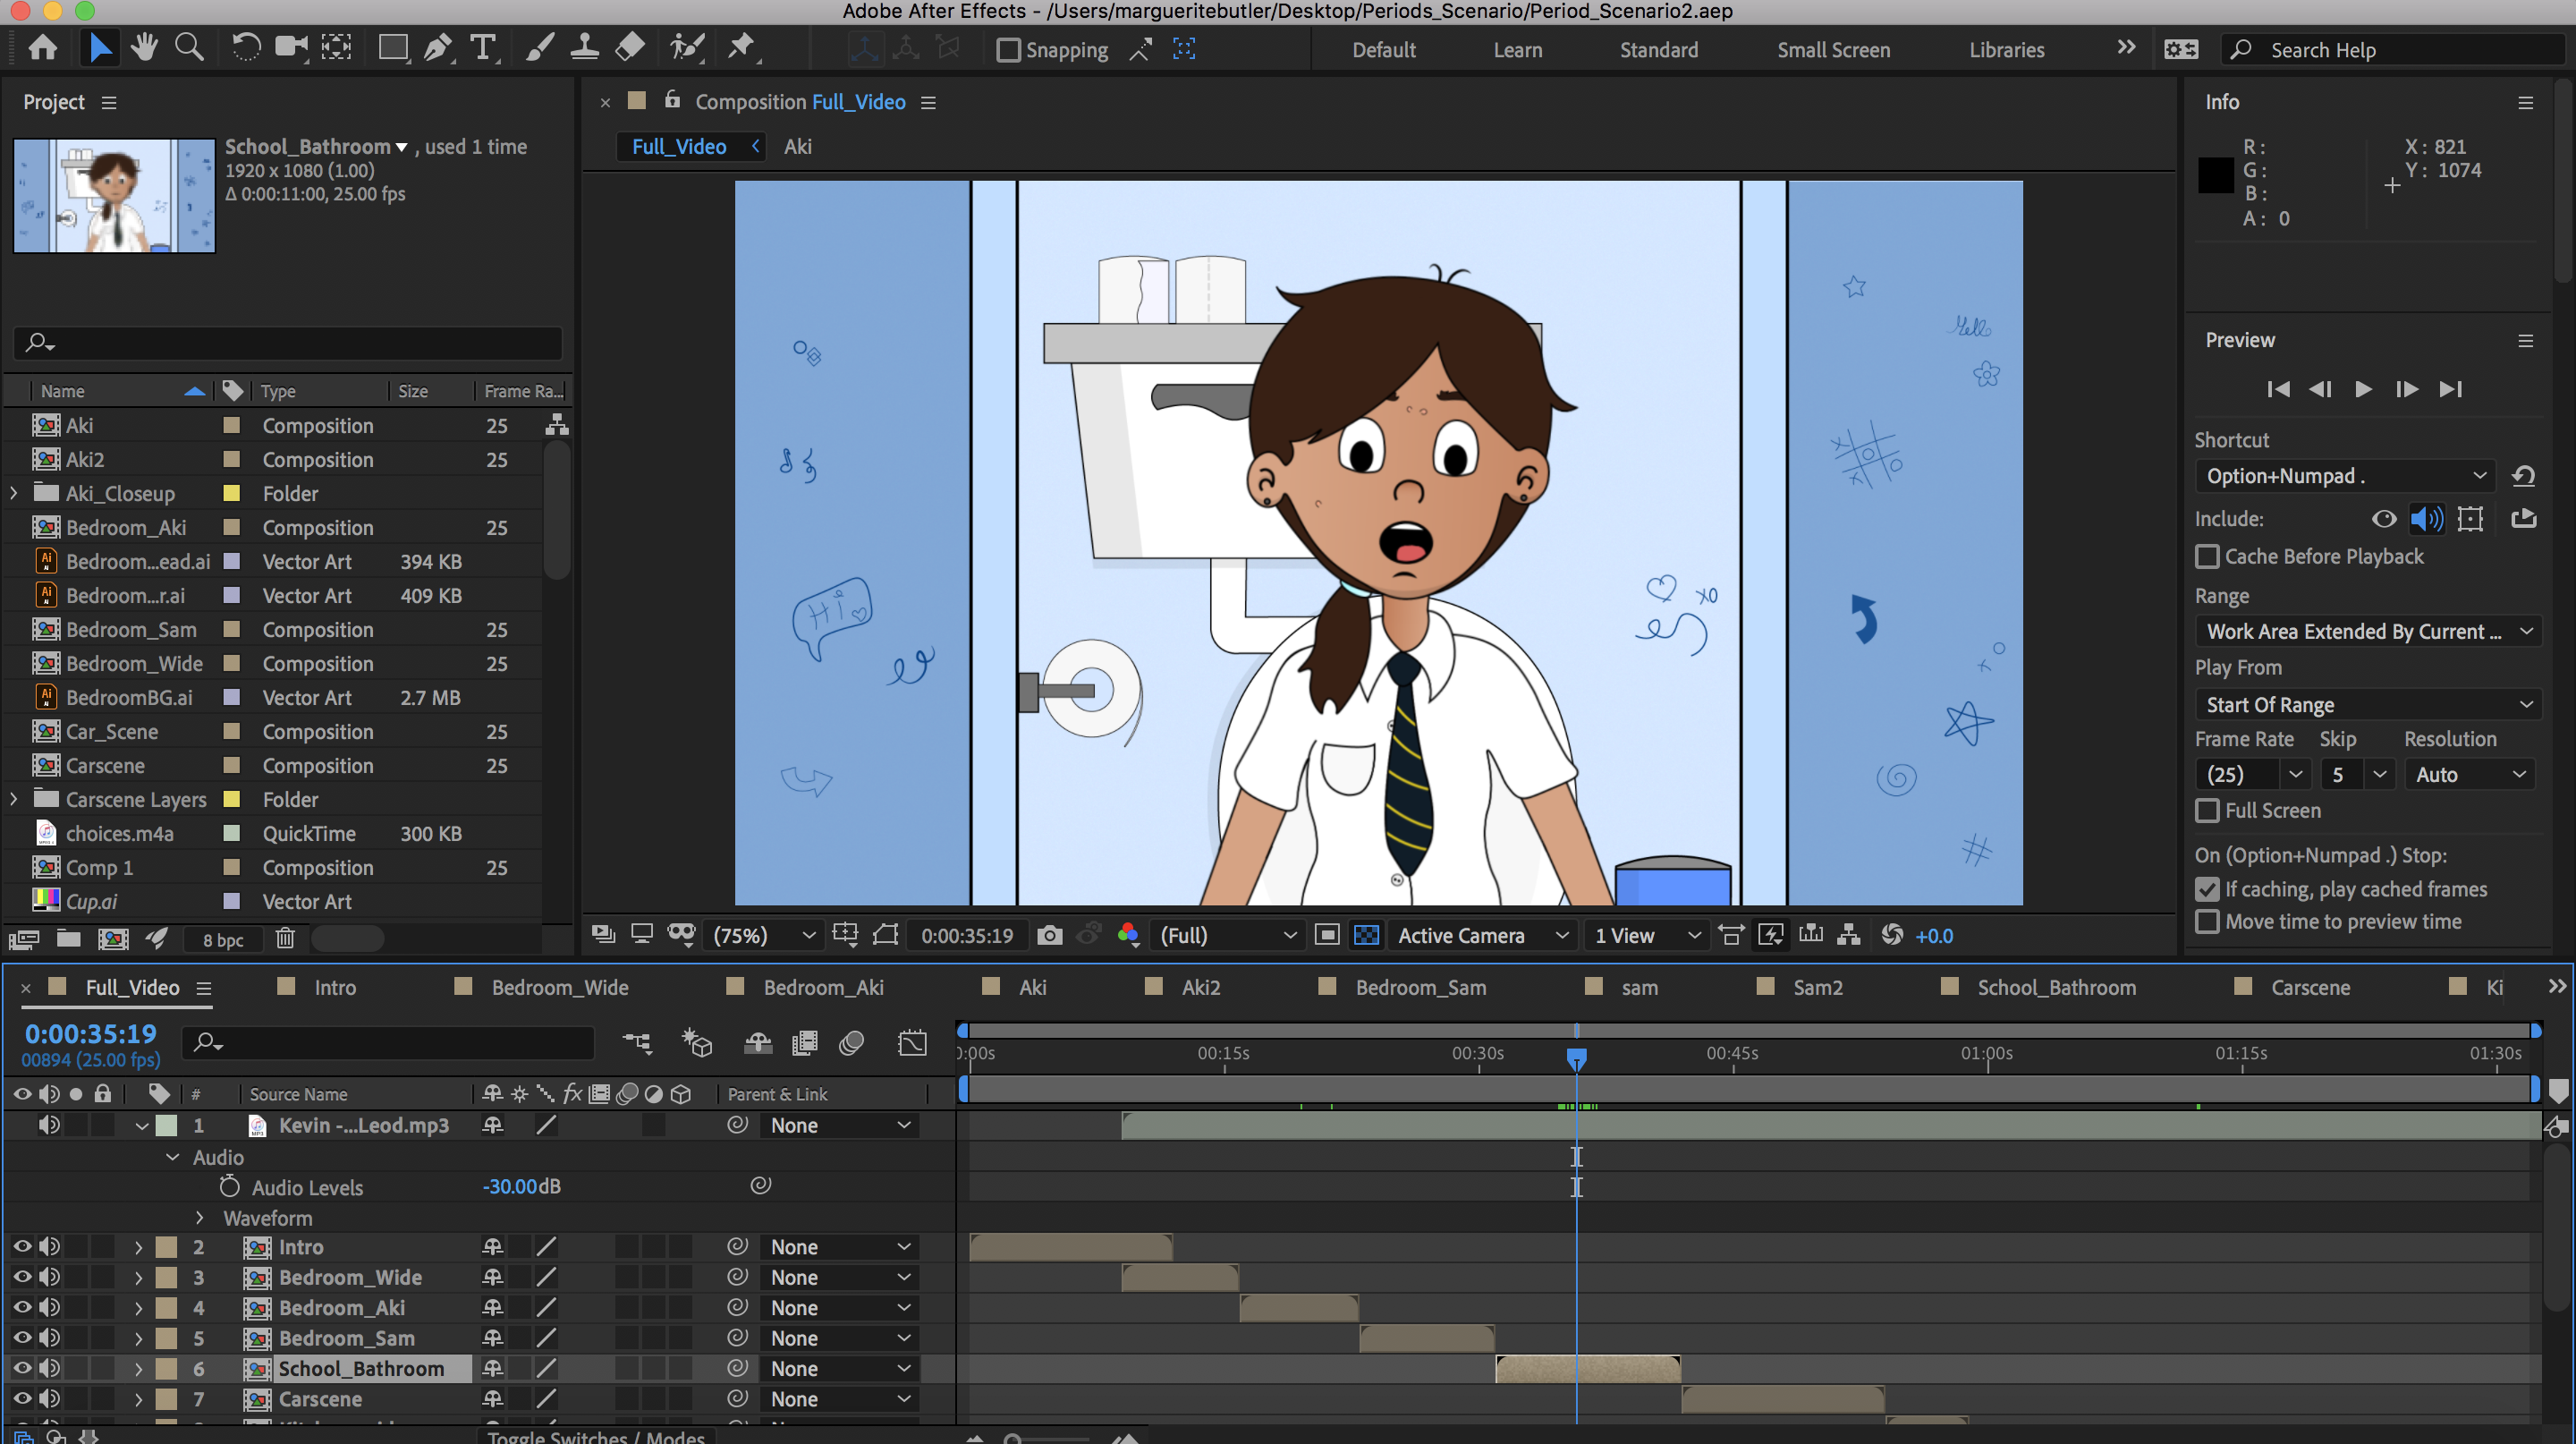
For Let’s Talk the majority of the character animations will be created by using Adobes Character Animate. Using this software makes it easier to animate facial expressions as it live motion capture of your own face through a webcam. This allows me to give a better performance to convey the correct emotion that I am trying to emulate. “Facial expressions convey a lot of emotion and it’s very important to understand these expressions and the way the face communicates emotion.” (Maestri, 2006, p.196) Before animating a face I practice the facial expression I want by using a mirror this gives me a better understanding of how to show this emotion correctly through the character.
Animation videos that we helpful when animating were the youtube channels ‘Jaiden Animations’ (Dittfach, 2019) and ‘Murrz’ (Murrz, 2019). Taking inspirations from their videos for ‘Lets Talk’ animated scenarios.
For animating backgrounds and composting the animations I used Adobe After Effects. I find using a combination of both soft wears gives the best result for my skillset.
Dittfach, J. (2019). Jaiden Animations. [online] YouTube. Available at: https://www.youtube.com/channel/UCGwu0nbY2wSkW8N-cghnLpA [Accessed 27 Mar. 2019].
Maestri, G. (2006). Digital character animation 3. Berkeley, Calif.: New Riders, p.105, p.117, p.118 p.123 p.127 p.196
Murrz (2019). Puberty. [image] Available at: https://www.youtube.com/watch?v=ZZ4CzW_aEBQ [Accessed 5 Apr. 2019].
Redman, R. (2018). 15 ways to improve your character animation. [Blog] Creative Bloq. Available at: https://www.creativebloq.com/audiovisual/improve-character-animation-41411447 [Accessed 20 Mar. 2019].
Wells, P. (2002). Animation: Genre and Authorship. London: Wallflower, p.1. [Accessed 23 Mar. 2019]
To form the basis of what each age group is recommend to know I looked at articles which gave a review of an age by age guide to Sex Education based on child sexual development and keeping children healthy and safe.
For Babies, this would be ages 0-24 months, they are taught the names of their body parts. This includes the Penis and Vulva. They are told it is okay to touch their body parts but only in private and never in public as it is inappropriate. Knowing the difference between boys and girls body parts and what each part does too.
“The end goal is for your child to be comfortable with their whole body and to see all parts as being equal (with no shame).”
During Early Childhood, ages 2-5 years old, they learn about correct names for body parts, the similarities between boys and girls, such as nipples/bottoms/noses/hands. They are told its okay to be different and that our bodies can tell us what we are feeling like being tired, hungry or sad.
Privacy is introduced with learning things such as, not showing your private parts in public or when people outside of family are at home. Other people’s privacy must be respected like when going to the toilet you must knock if the door is shut. Conversations about bodies and for at home in private with their parents. They must know touching themselves is okay but that there is a time and place for it.
To explain how the baby comes out,
Body ownership and touching is introduced by explaining they have the right to
“
Middle Childhood, ages 5-8 years old start to know what words to use for both boys and girls body parts and have some knowledge about internal reproductive organs. They learn t
They are given and introduction to Puberty and told their bodies will change as they get older. Sexual Intercourse is spoken about by explaining
Sexual Behaviour is covered also, including masturbation and
Late Childhood, ages 9-12 years old, is where all the above topics are spoken about but with more detail. In relation to Puberty they must know w
In relation to Sexual Behaviour, b
Knowing what the recommended topics to talk to your child about at each stage of their life can be helpful when they start asking questions or when you feel like they should know more about their body. This guide can also be taken into account when using Let’s Talk to talk to their child about Puberty and Sex. Having an app may take some of the pressure off the parent to get everything perfect. They can chose specific chapters they feel is necessary in the the app that suits the child’s current age.
References
Hakanson, C. (2016). My Kid Needs to Know What? An Age By Age Guide to Sex Education – And What to Do! (by Cath Hakanson) –. [online] Heysigmund.com. Available at: https://www.heysigmund.com/kid-needs-know-age-age-guide-sex-education/ [Accessed 28 Mar. 2019].
When creating the poster that would represent the project “Let’s Talk” it was essential to outline the content that would be represented on the poster. This allowed for the headings and subheadings of the poster to be decided and allowed for the gathering of the essential information that would be put into each section. It was decided that there would be a brief description of the project and its goals, the research conducted about the topic, the problem we identified, the solution we created, and the future of the project. Once the content was decided it was essential to decided the presentation, or order of the content and how it would be displayed on the poster, the hierarchy of information.
A draft of the text that would be on the poster was then created, reworked and finalised.
Once the information was finalised the next step was to roughly sketch out various poster designs. That could represent the information accurately while also conveying the project aims, being cohesive with the branding guidelines of the project. The aim of the poster is to convey a positive and professional profile, while establishing “Let’s Talk” as a commercially viable product.
Initial Sketches


Following the sketches once a design had been chosen the next step was choosing a colour palette with which to create the poster. Sticking with the branding and visual identity, the colour palette to represent the project was blue, yellow, orange and pink. Utilising this colour palette allowed for a consistent branding identity with both the application and the visual components associated with the application.

The final aspect of creating the poster for “Let’s Talk” was created a digitised version of the chosen design. Initially graphics were created to place on the poster. Utilizing the various colours in the colour palette allowed for the poster to be split into sections without creating defined borders. Overall the finished poster conveyed a professional and informational tone, but simultaneously stuck to the overall fun and happy tone of the project.

‘Progressive App design offers us a way to build better experiences across devices and contexts within a single codebase’ (Russel 2015). Progressive Web Applications involves using web development technology to create applications that can run smoothly on multiple platforms and devices without having to make a specific application for each individual platform.
‘Progressive Web Apps are experiences that combine the best of the web and the best of apps. They are useful to users from the very first visit in a browser tab, no install required. As the user progressively builds a relationship with the app over time, it becomes more and more powerful. It loads quickly, even on flaky networks, sends relevant push notifications, has an icon on the home screen, and loads as a top-level, full screen experience.’ (Your First Progressive Web App. n.d.) They way we use mobile devices compared to desktop devices is quite different, apps are at the center of mobile activity as opposed to on desktop where a large component of our activities take place online.
An example used by Alex Russell, a google chrome engineer, at the 2016 Progressive Web App Summit, was google maps. After a show of hands he observed , not to his surprise, that most people navigated to google maps through the web on their desktop computers, but when asked the same question about mobile, most people put their hands down. If you were to get to google maps on your phone you would more than likely do it via their app. “We don’t really use the web on mobile the way we do on desktop, but remember we started with native apps on desktop too.” (Russell 2016).
People gravitate towards native apps because of their speed, reliability and immersive experience. However in the last few years web technology has developed so that we can achieve a similar speed, reliability and experience as native technology. PWA’s encompass mobile(or desktop) websites that can act and react like native apps, providing offline service, fast interactions and immersive full screen experiences.
“Progressive Web Apps are user experiences that have the reach of the web, and are:
This new level of quality allows Progressive Web Apps to earn a place on the user’s home screen.” (Progressive Web Apps, n.d.)
Unlike native applications, which require downloading via that app store, Progressive Web Applications “While a PWA can be treated like a standard application on a device, the ability for it to be run from a uniform resource locator (URL) makes it easy to use the application on any device with a browser.”
App Shell Model
“An application shell is the minimal HTML, CSS, and JavaScript powering a user interface. The application shell should:
An application shell is the secret to reliably good performance. Think of your app’s shell like the bundle of code you’d publish to an app store if you were building a native app. It’s the load needed to get off the ground, but might not be the whole story. It keeps your UI local and pulls in content dynamically through an API.”(Gaunt, M. Osmai, A. 2019)
The App Shell Model is different for every Progressive Web Application. Google developer provides a codelab on Progressive Web Apps (Progressive Web Apps, n.d.), this lab provides a guideline set of questions one should ask themselves when designing their app shell model.
On screen immediately, we need the login screen, after this, we will need to go to the “What is Puberty ?” page after which the character will be selected and the diary page can be shown. If they are logging back in it will them straight to the diary page
The forward and back arrows to navigate through the pages.A loading gif for content that is downloading or has not yet been downloaded.
The background images, button images and a loading gif.
Service workers are Progressive Web Applications solution to offline functionality, they cache previous loads of the application shell and use this when the network isn’t available. Normally if connection fails on a web page, you don’t see any content or you get the offline dino game on screen. Progressive web apps show you shell of the web application even if the content on the page will not be loaded until the connection is established again. This provides users with an experience that more closely emulates that of a native application. “A service worker is a script that runs in the background, separate from your web page. It responds to events, including network requests made from pages it serves and push notices from your server. A service worker has an intentionally short lifetime. It wakes up when it gets an event and runs only as long as it needs to process it.” (Gaunt, M. Osmai, A. 2019) Essentially, once a user loads the application once the application shell is cached. Once the user reopens the same application, the service worker grabs the application shell from the cache which is stored locally on the device. This not only allows for the application shell to be accessed when the device is offline, it allows for faster loading times than if the application shell was to be downloaded from the network on every single load.
“With offline first we assume of line, and do as much as we can with local content, the try and get content from the network, and the more we get to render without a connection, the better. So you should think of the network as a piece of progressive enhancement, an enhancement that may not be there” (Archibald, J. 2016) Service workers are made using Javascript, and the act as a buffer between the page and the network. Usually page request go straight to the network and the network send things back to the page directly. A service worker is placed between the network and the page so requests from the page must first go through the service worker before they reach the network.
The Application Shell will always be cached locally, because no matter how fast your connection, it will be much faster to retrieve the application shell from the devices cache. This is done using an install event which is triggered when the browser reads the service worker initially. This will not happen by default, and so you must add it to the fetch event, this will then check that if the url is the homepage and if the statement rings true, the application shell will be added to the cache. We then set up the network as a fallback for this request, so that if the data required isn’t available in the cache the page then requests it from the network. “The network only matters to fetch new data, and that’s the offline first goal” (Archibald, J. 2016)
Bibliography
Archbald, Jake 2016 Instant Loading Offline First (Progressive Web App Summit), Google Chrome Developers, viewed on 22/03/2019
Bob Frankston, March 2018, Progressive Web Applications, IEEE Consumer Electronics Magazine, accessed on 21/03/2019 via https://ieeexplore-ieee-org.cit.idm.oclc.org/stamp/stamp.jsp?tp=&arnumber=8287006
Gaunt, M. Osmai, A. February 2019, Instant Loading Web Apps with an Application Shell Architecture, Google Developer, accessed on 22/03/2019 via https://developers.google.com/web/updates/2015/11/app-shell
Progressive Web Apps, n.d. Google Developer, accessed on 21/03/2019 : https://developers.google.com/web/progressive-web-apps/
Russel, Alex June 15th 2015, “Progressive Web Apps, Escaping Tabs Without Losing Our Souls”, ‘Infrequently Noted’, blog post. Viewed on 21/03/2019 at URL : https://infrequently.org/2015/06/progressive-apps-escaping-tabs-without-losing-our-soul/
Russell, Alex 2016, Opening Keynote (Progressive Web App Summit 2016), Google Chrome Developers, viewed on 21/03/2019 https://www.youtube.com/watch?v=9Jef9IluQw0&index=3&list=PLNYkxOF6rcIAWWNR_Q6eLPhsyx6VvYjVb
Your First Progressive Web App, n.d., Google Developer – Code Lab accessed on 21/03/2019 via https://codelabs.developers.google.com/codelabs/your-first-pwapp/#0
“Branding, by definition, is a marketing practice in which a company creates a name, symbol or design that is easily identifiable as belonging to the company.” (Smithson, 2015)
Ahead of creating the visual identity for “Let’s Talk” I felt it was important to initially research the basics of branding to familiarize myself with common methods and practices in order to create a successful and cohesive brand for the project. It is important to create a visual identity that translates the project’s goals while simultaneously creating a professional, distinguishable and memorable impression on both clients and competitors. Graphics and visuals associated to the project will aim to work together and create a unique, cohesive and competent identity.
Branding is an important aspect in the development of a product or business, there are many benefits to a strong visual identity.
Brand Strategy is how, what, where, when and to whom you communicate and deliver your brand message. What you communicate visually and verbally, and where an how you do it are all important aspects of your brand strategy. It is vital to have consistent and strategic branding. Successful branding adds value to the product or business. Evoking emotion and perceived quality are intrinsic to creating added value to a product.
When defining the branding identity of “Let’s Talk” it was important to consider various aspects of the project, such as, the goal of the project, target market and customer expectations, and the qualities associated with the project. It was essential to research the target market and become familiar with the expectations they have for an application like “Let’s Talk”. It was also essential to research the current competitors of the application to gauge the level of professionalism and gain further insight into how to reach customer expectations.
Creating a logo for let’s talk was an essential step in the development of the branding identity. When developing a logo for the project it was vital to keep the project aim an essential part of the logo, as it will be the visual that is most associated with the project. Creating an open and honest conversation about puberty and sex education is the main aim of the “Let’s Talk” and it was important to incorporate this into the logo design.
Initial Sketches were drawn up
Finalised initial logo design.

As the branding and project evolved it became apparent that the initial logo no longer represented the project in a successful way. So it was decided to revisit the logo and develop a new logo the portrayed a more professional tone. A further two logos were designed and developed.


Before finalising with
REFERENCES
Smitson E, (2015) What Is Branding And Why Is It Important For Your Business?, viewed 21/03/2019 via <https://www.brandingmag.com/2015/10/14/what-is-branding-and-why-is-it-important-for-your-business/>
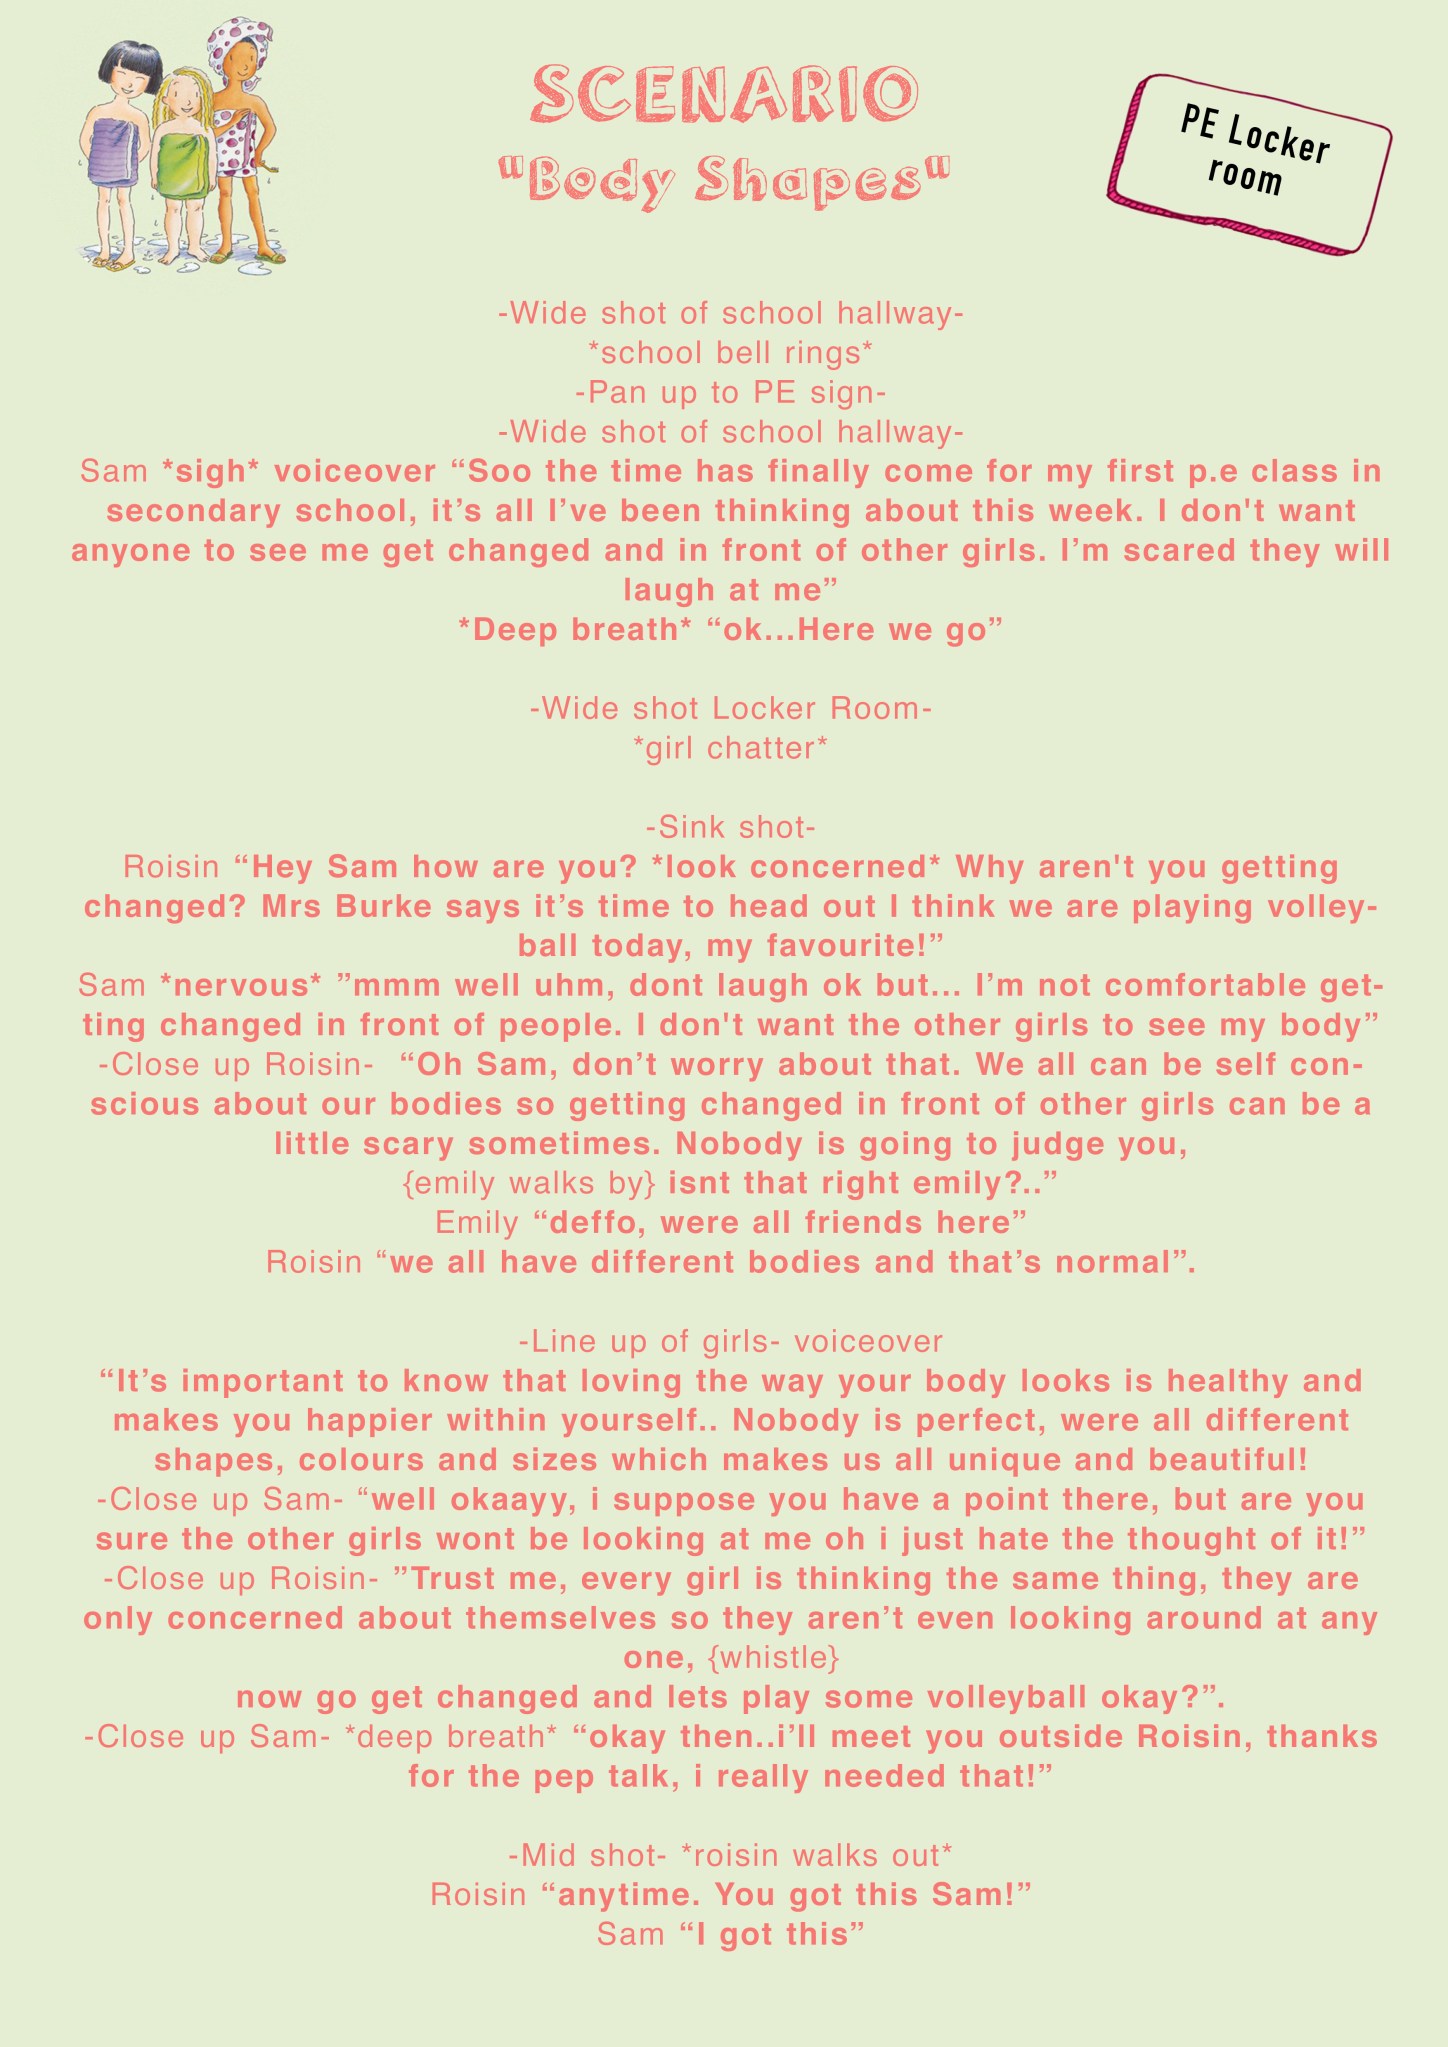
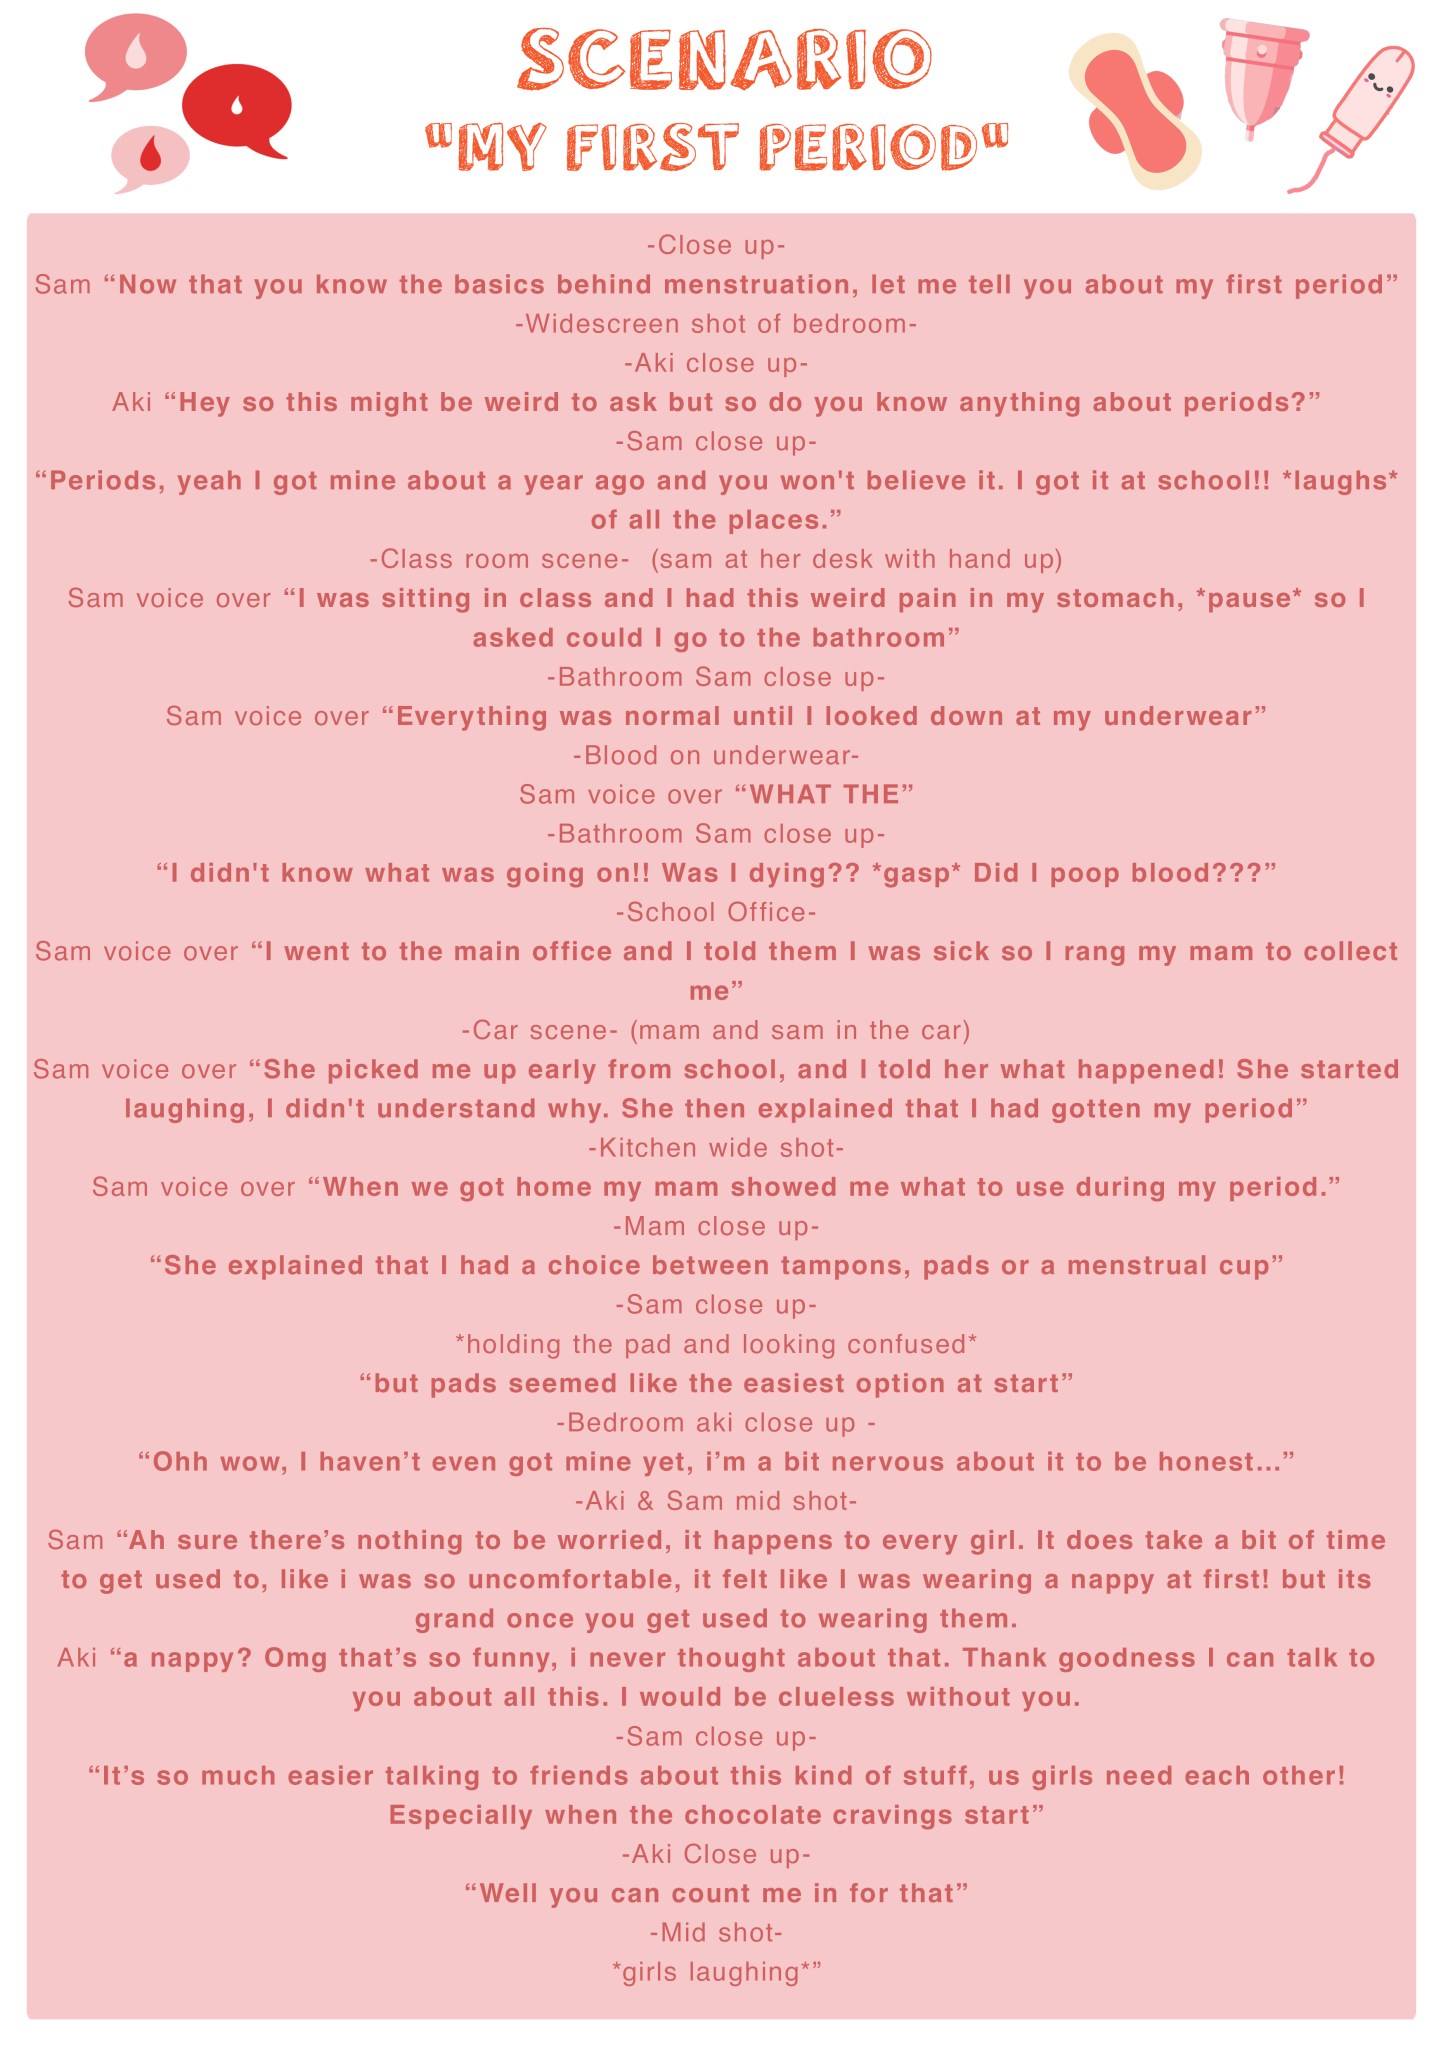
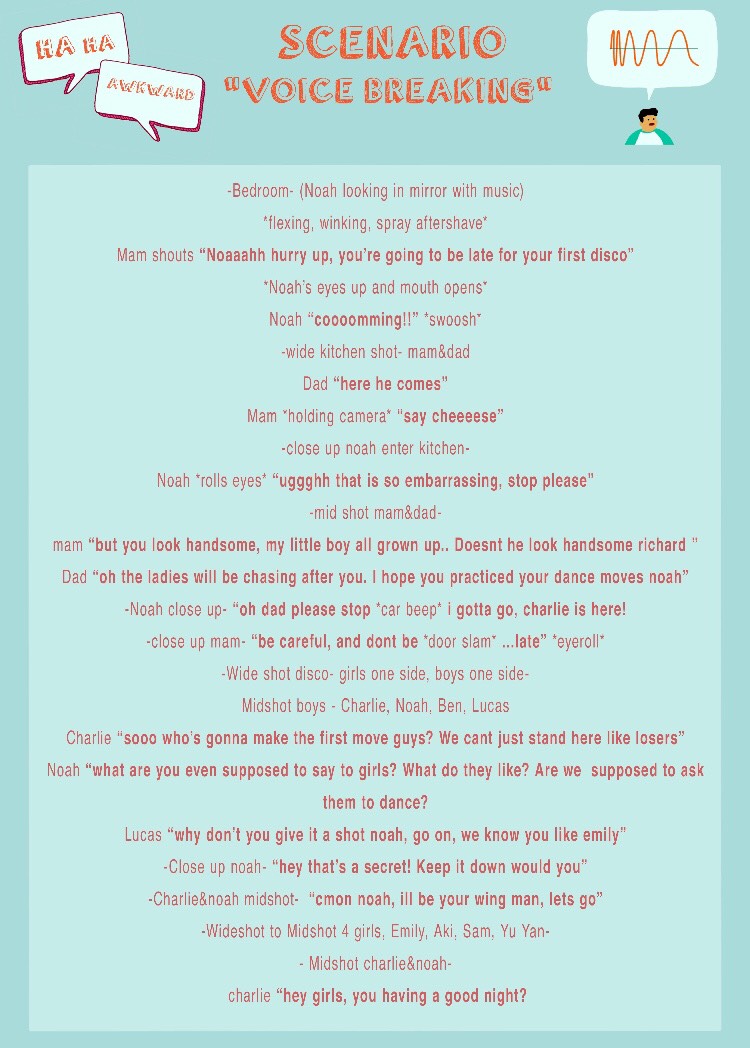
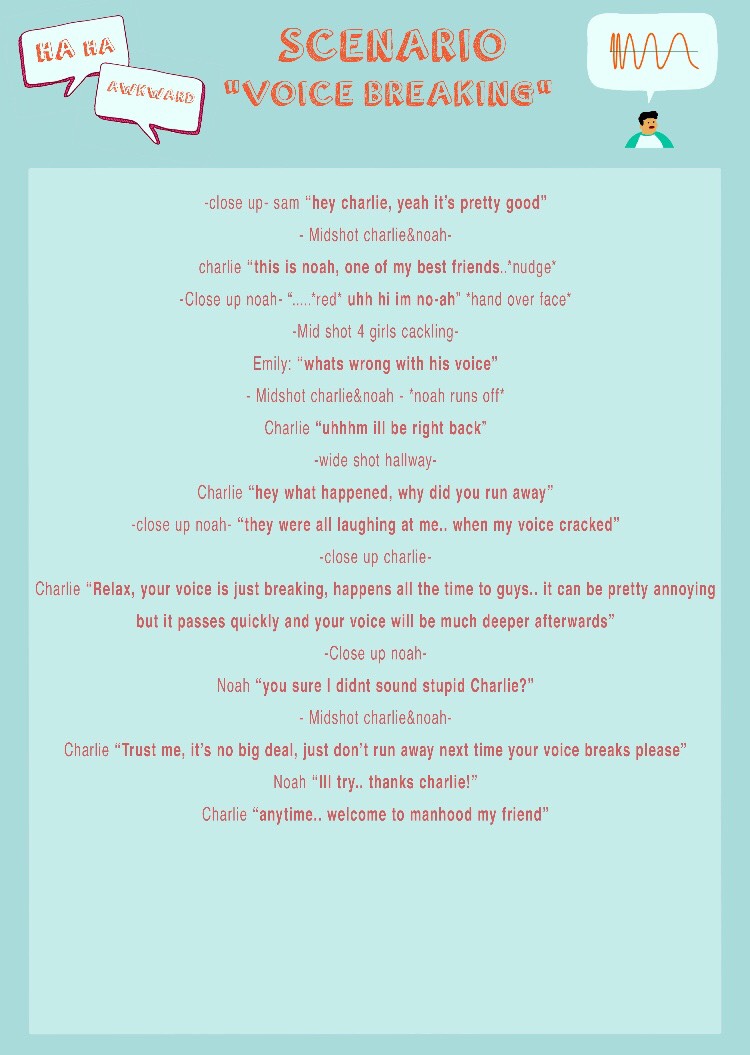
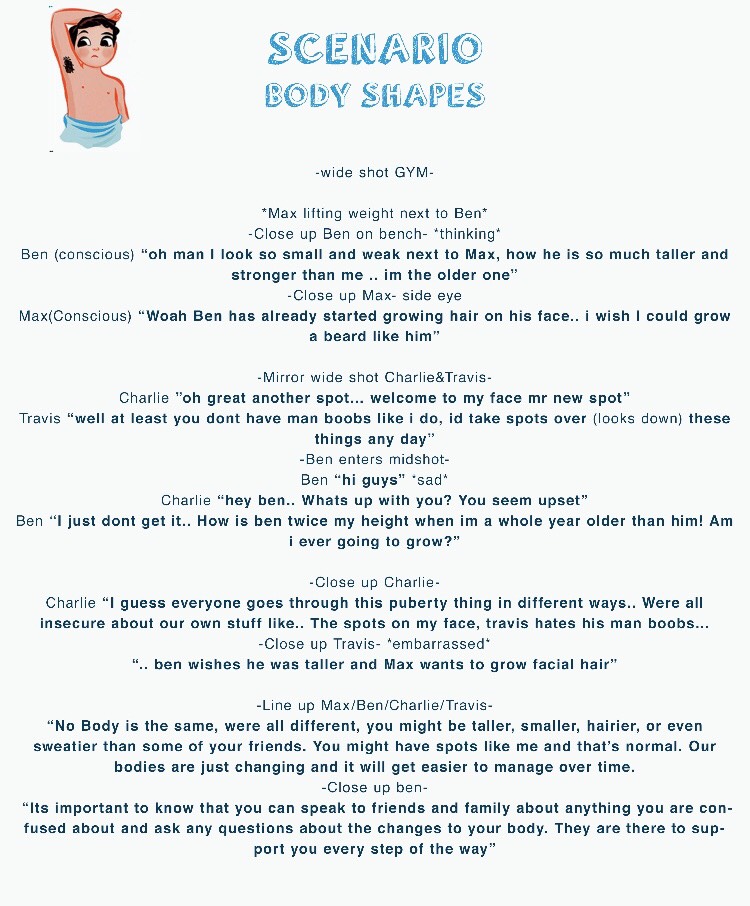
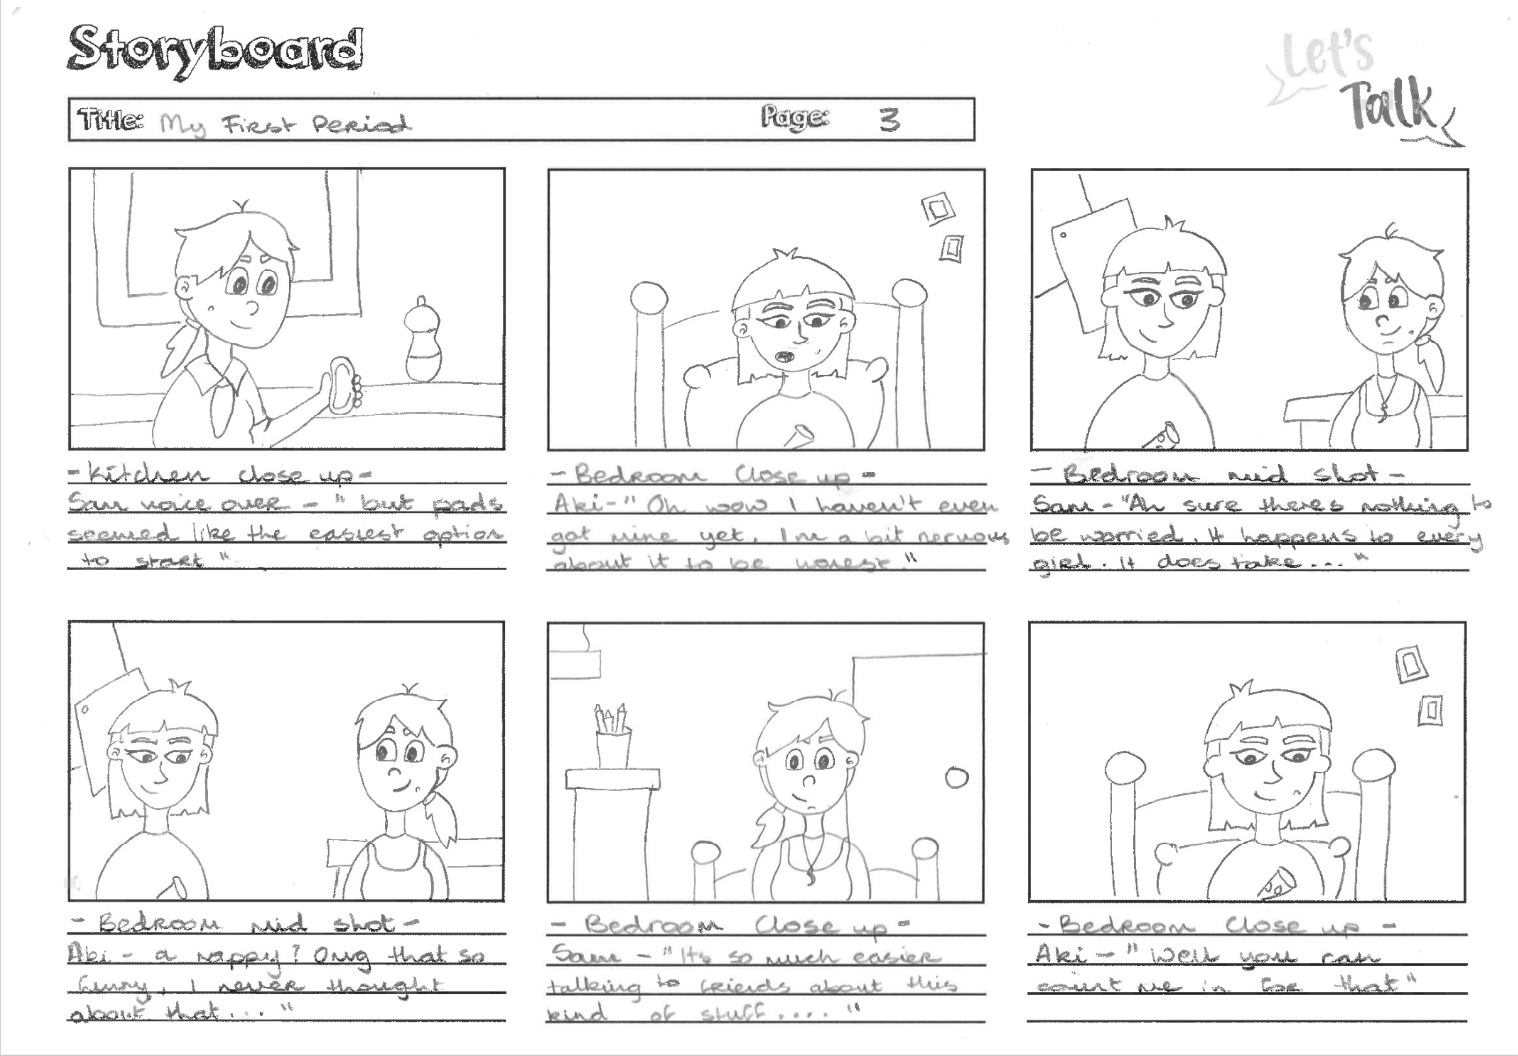
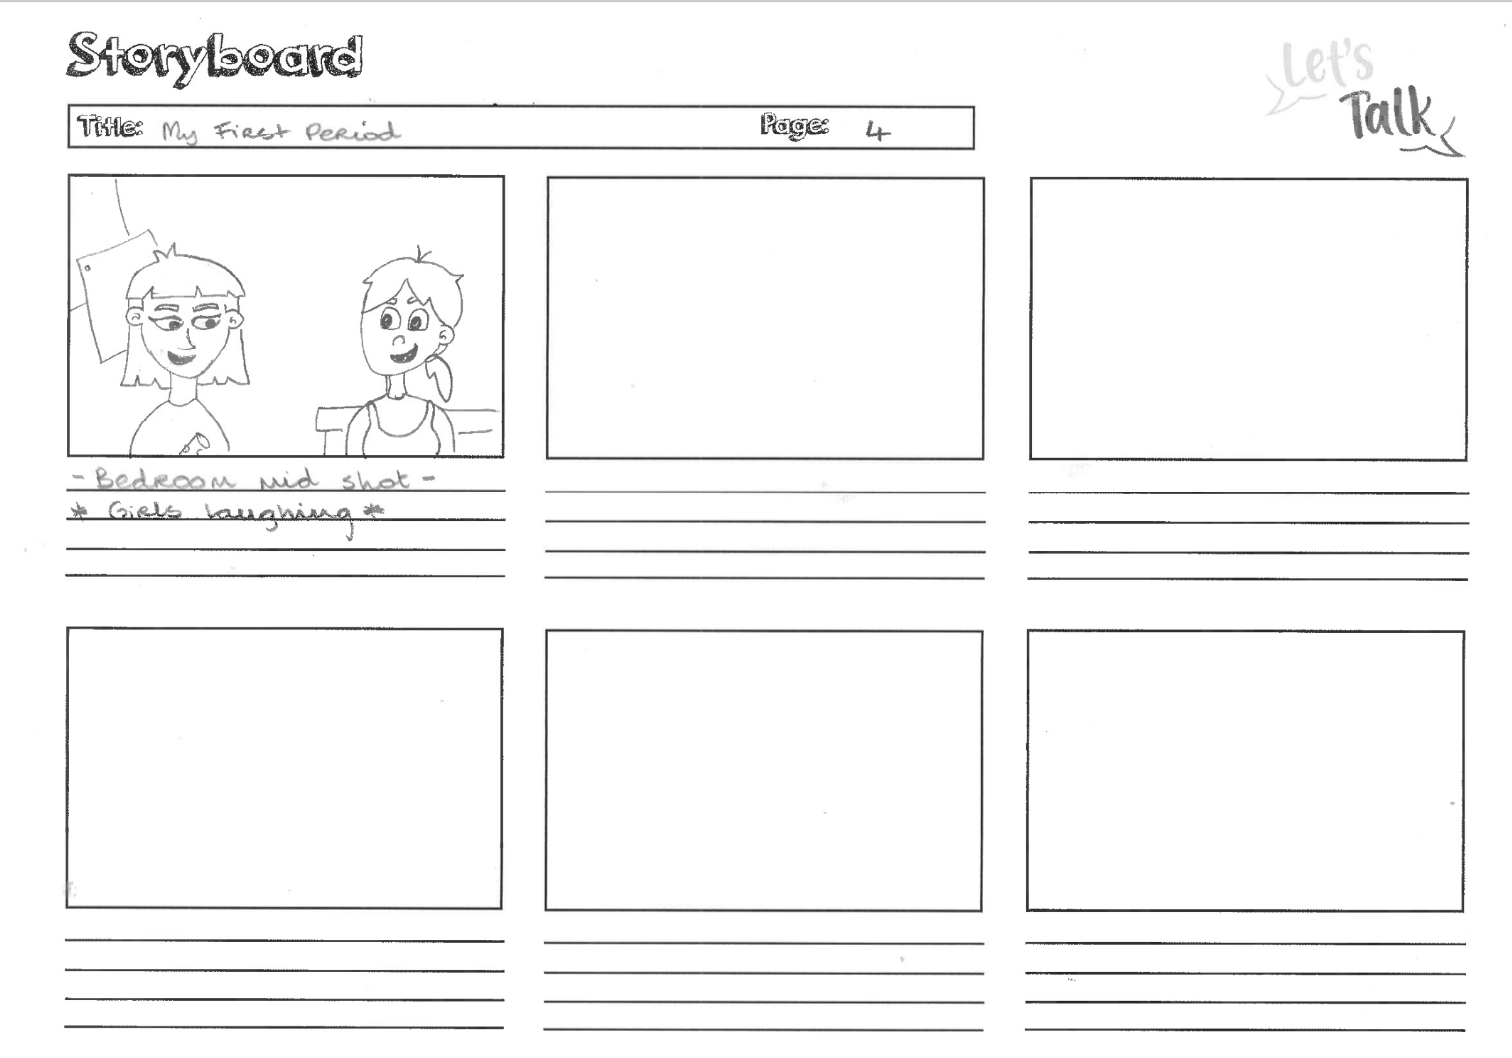
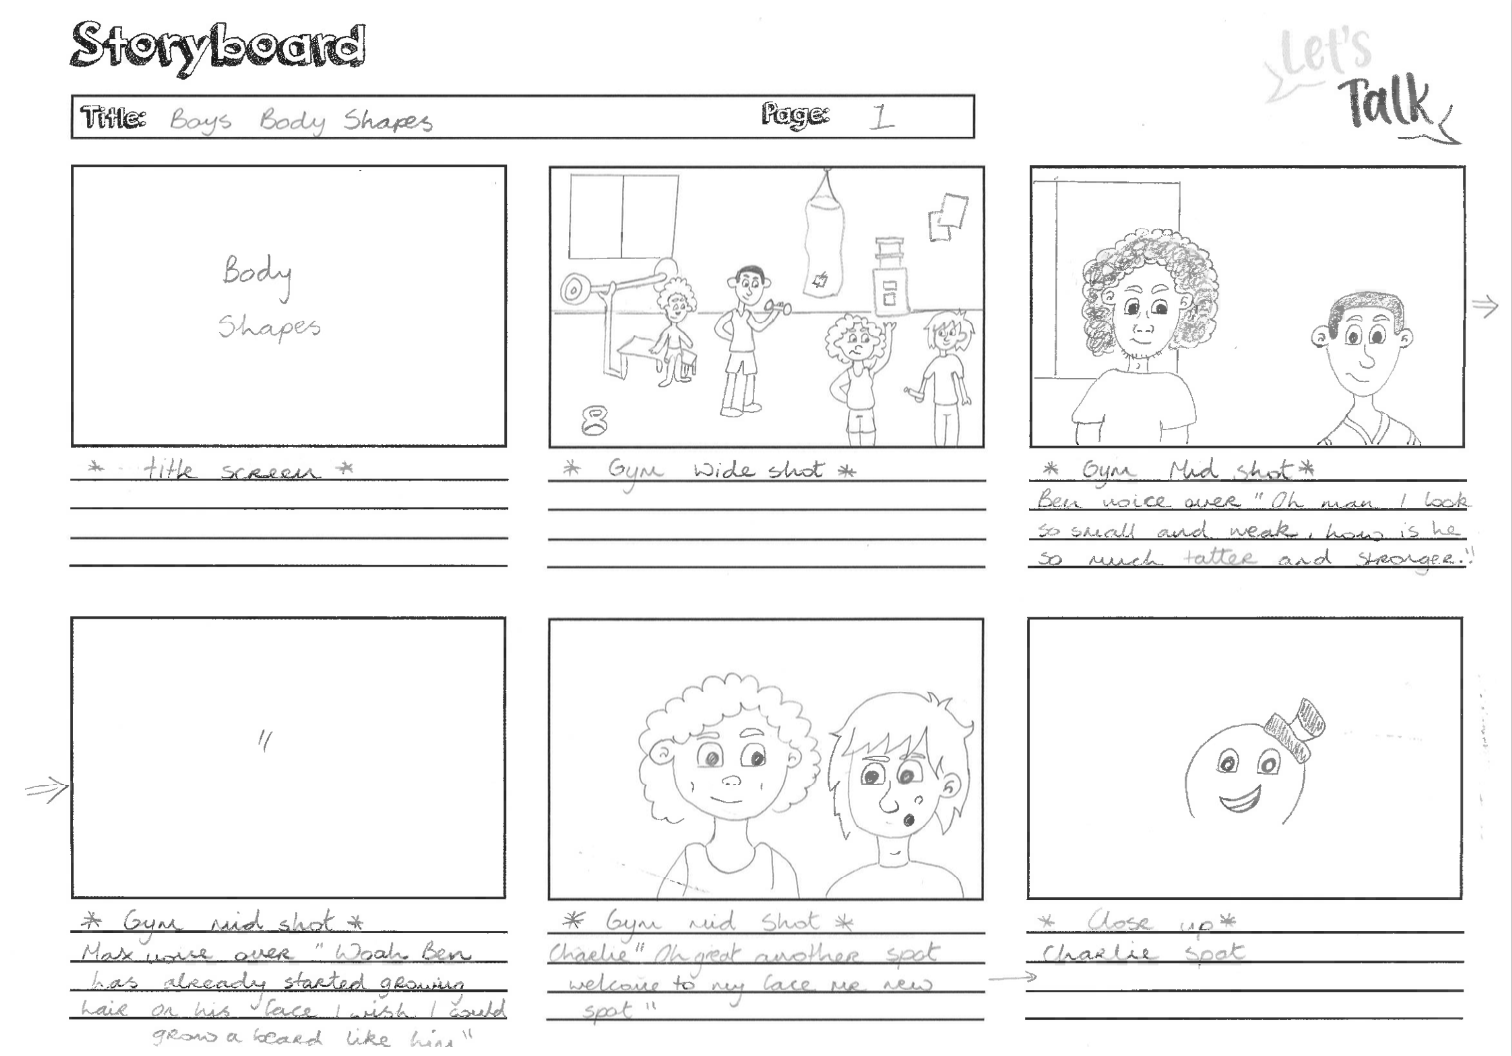
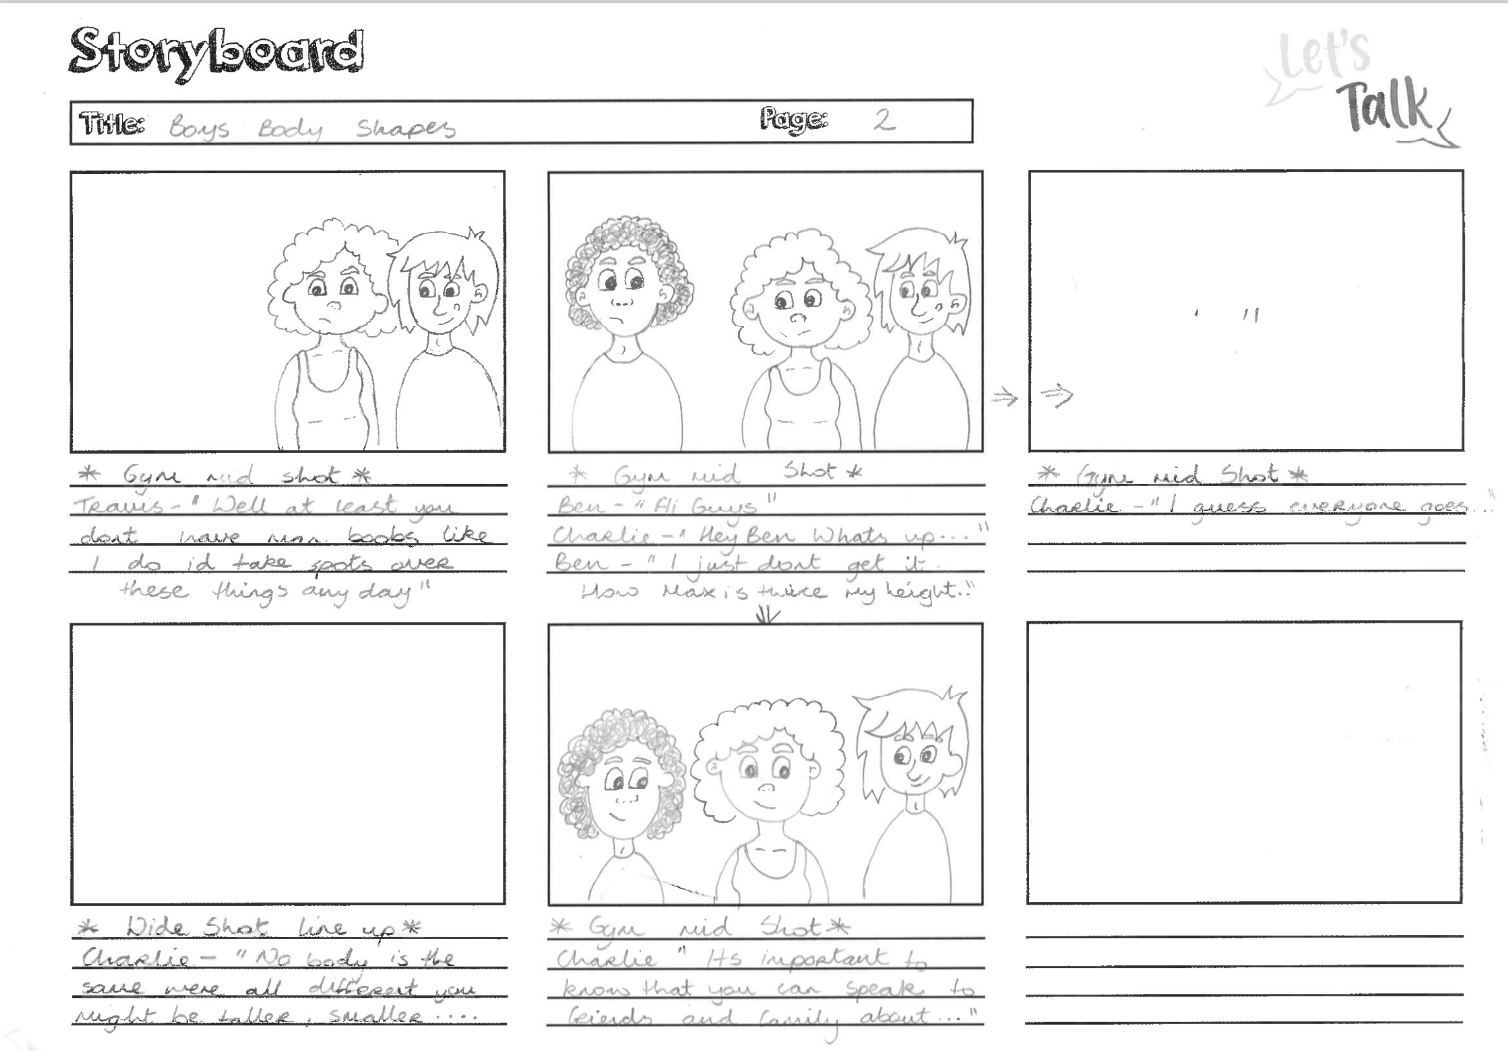
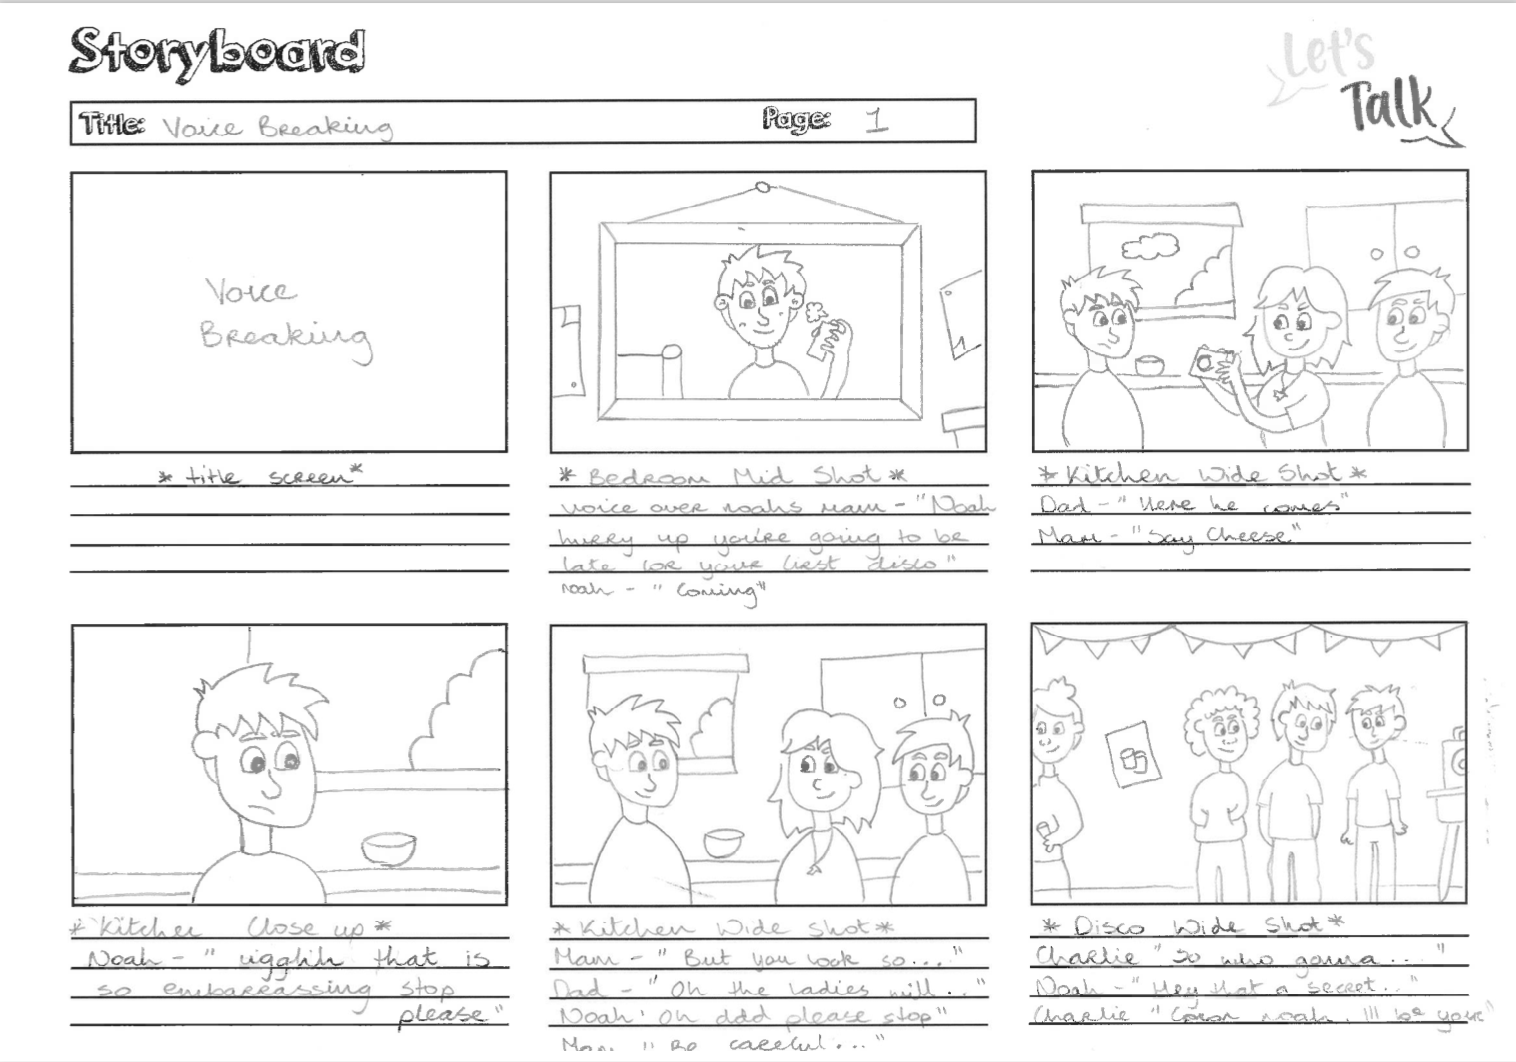
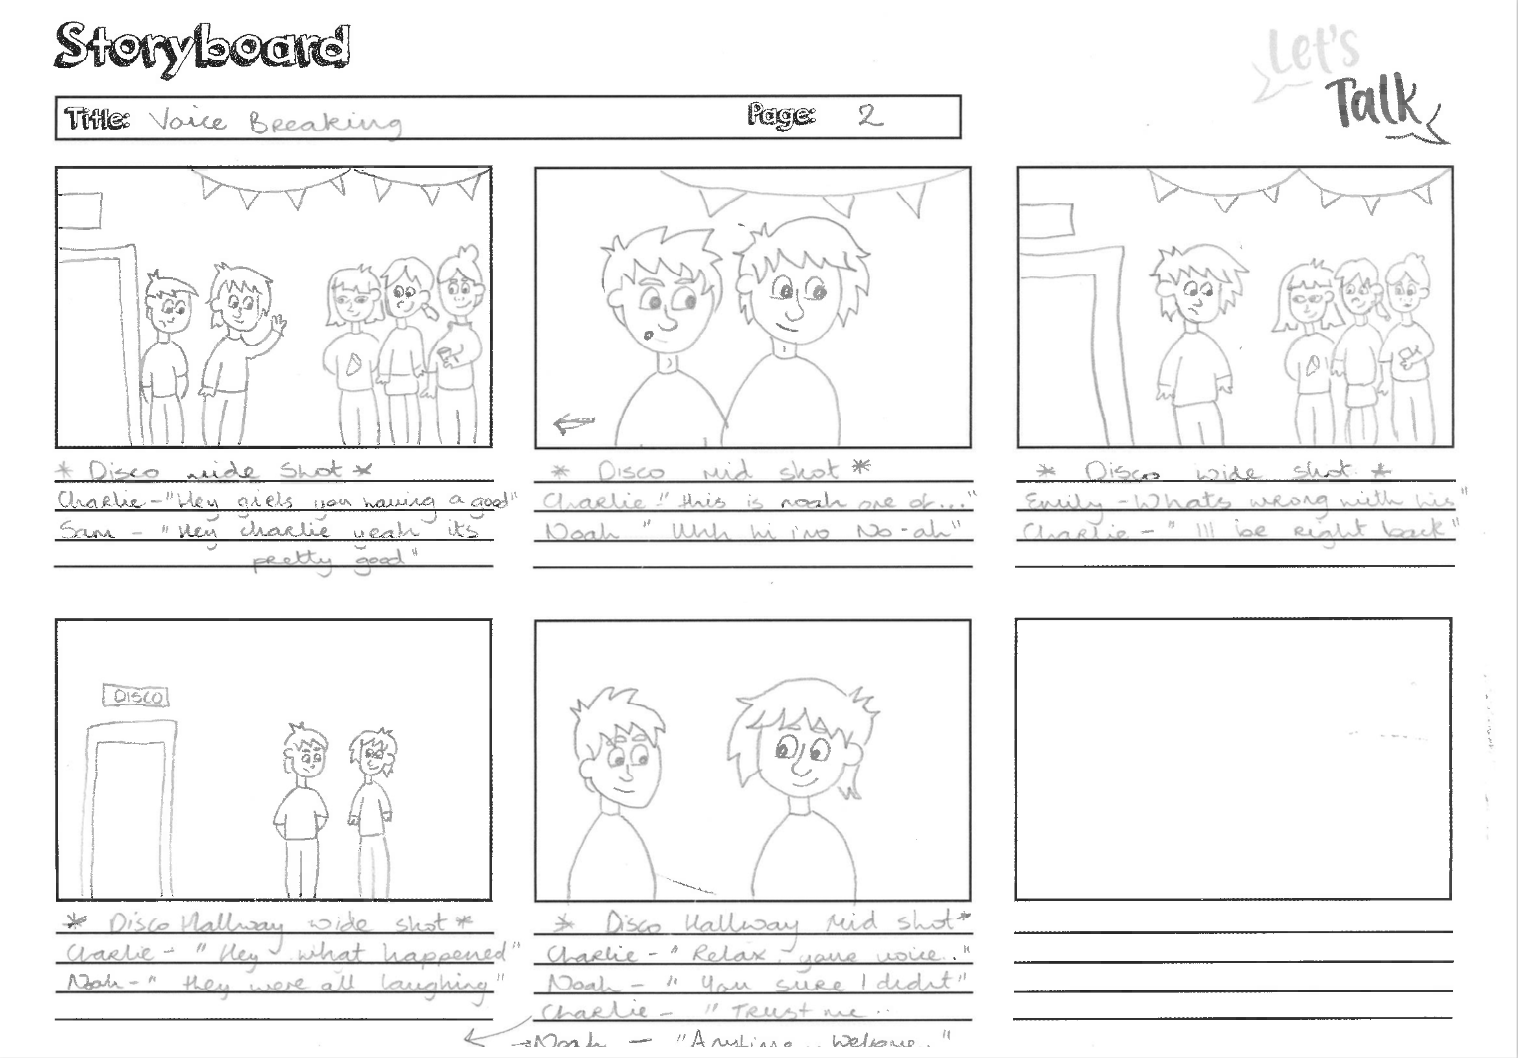
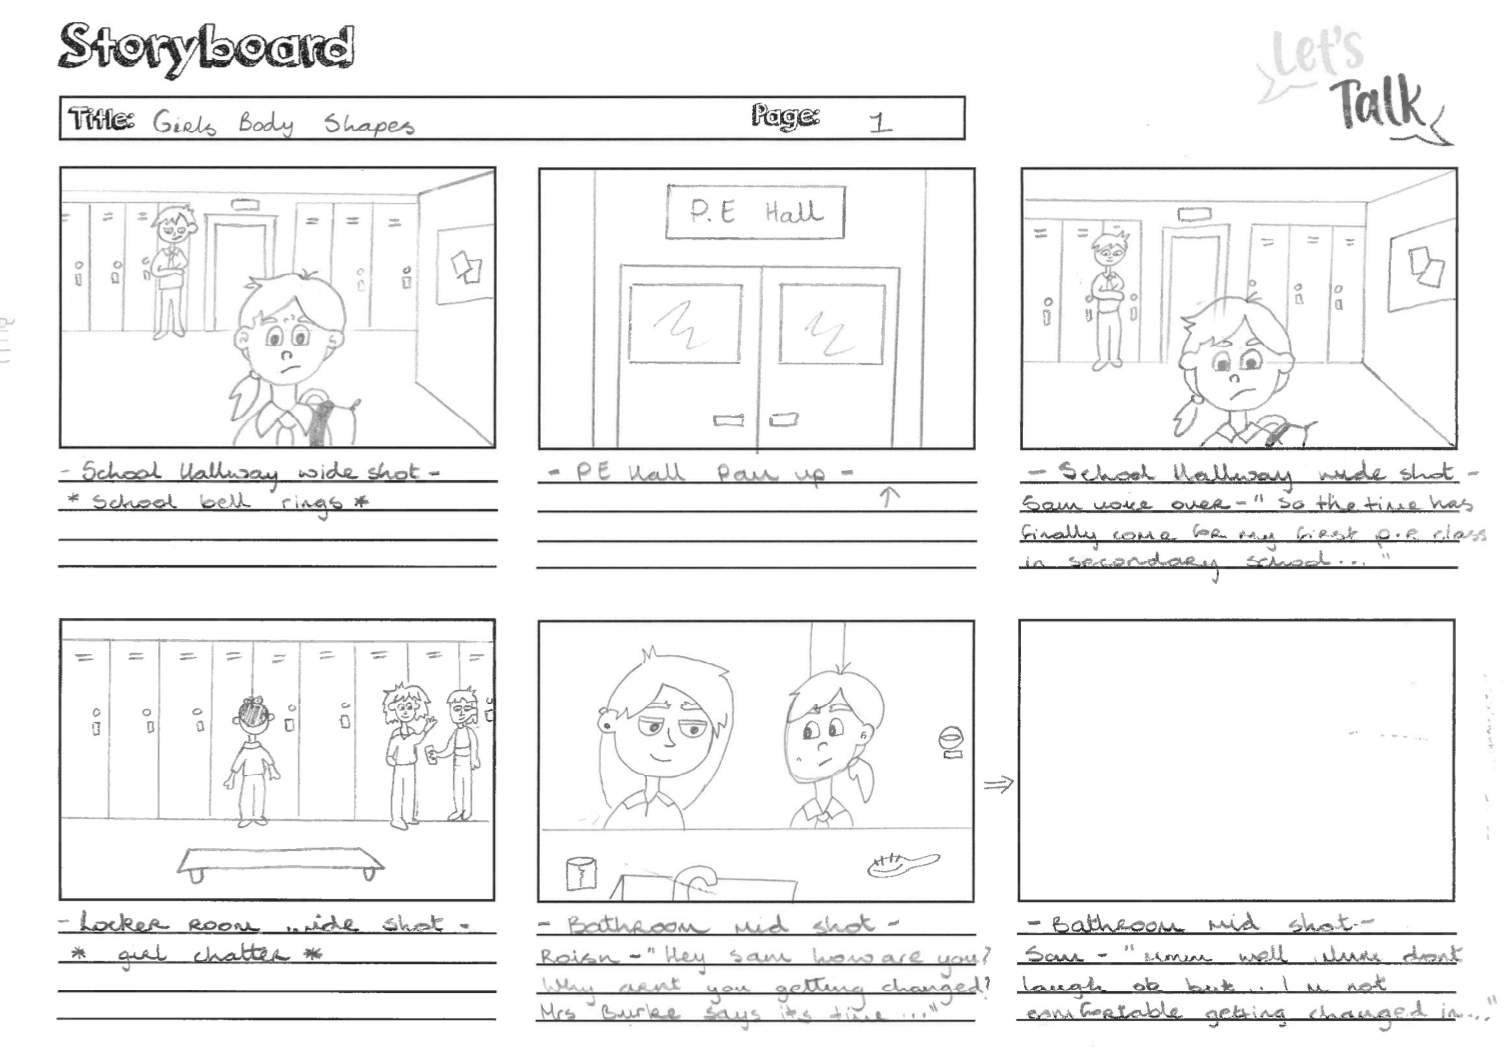
When creating the storyboards for the app, I worked closely with the Lead Content Creator Hazel Lambe. We discussed how we would transfer what was on the scripts to storyboards. We kept in mind my abilities as an animator and what was possible to design and create within the time limit we had. We agreed that four scenarios was appropriate two for the boys and two for the girls. After the scripts was completed, I started creating the storyboards. I have gained knowledge on creating storyboards from my time studying Creative Digital Media by taking modules such as Advanced Animation, Film Language and Cinematography. I added to this knowledge by researching other mediums.
“So animation scripts have traditionally included the camera shots, as if the writer was directing the story. A finished animation script is still a work in progress with the storyboard artist who follows, improving upon the look of the story. But it’s the writer who initially visualises each shot in his head.” (Wright, 2005) This is true when myself and hazel worked together. She wrote the initial scripts and having a vision of what she wanted the animations to look like. I aided in this process by making her vision come to life and making adjustments were needed.
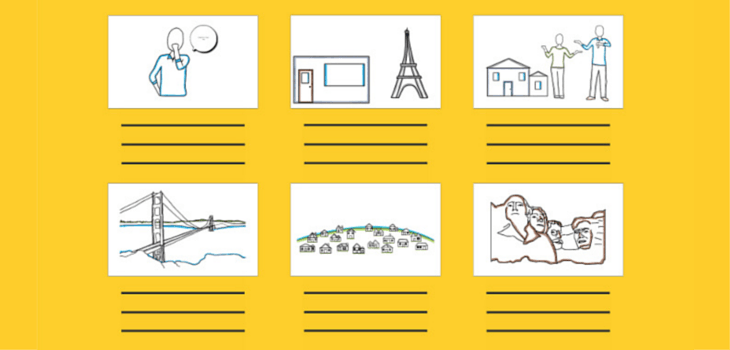
So what is a storyboard, it is a graphic representation of what will take place throughout a video, shot by shot. It is made up with a number of rectangles that have illustrations/pictures/drawings that show what each shot will include within the scene and also what is being said in the script during that shot. (Vyond.com, 2018)
“The storyboard should serve as a blueprint for any film project and as the first visual impressions of the film. It is at this stage that the major decisions are taken as far as the film’s content is concerned. It is generally accepted that no production should proceed until a satisfactory storyboard is achieved and most of the creative and technical problems which may arise during the film’s production have been considered.” (Whitaker and Halas, 2002)
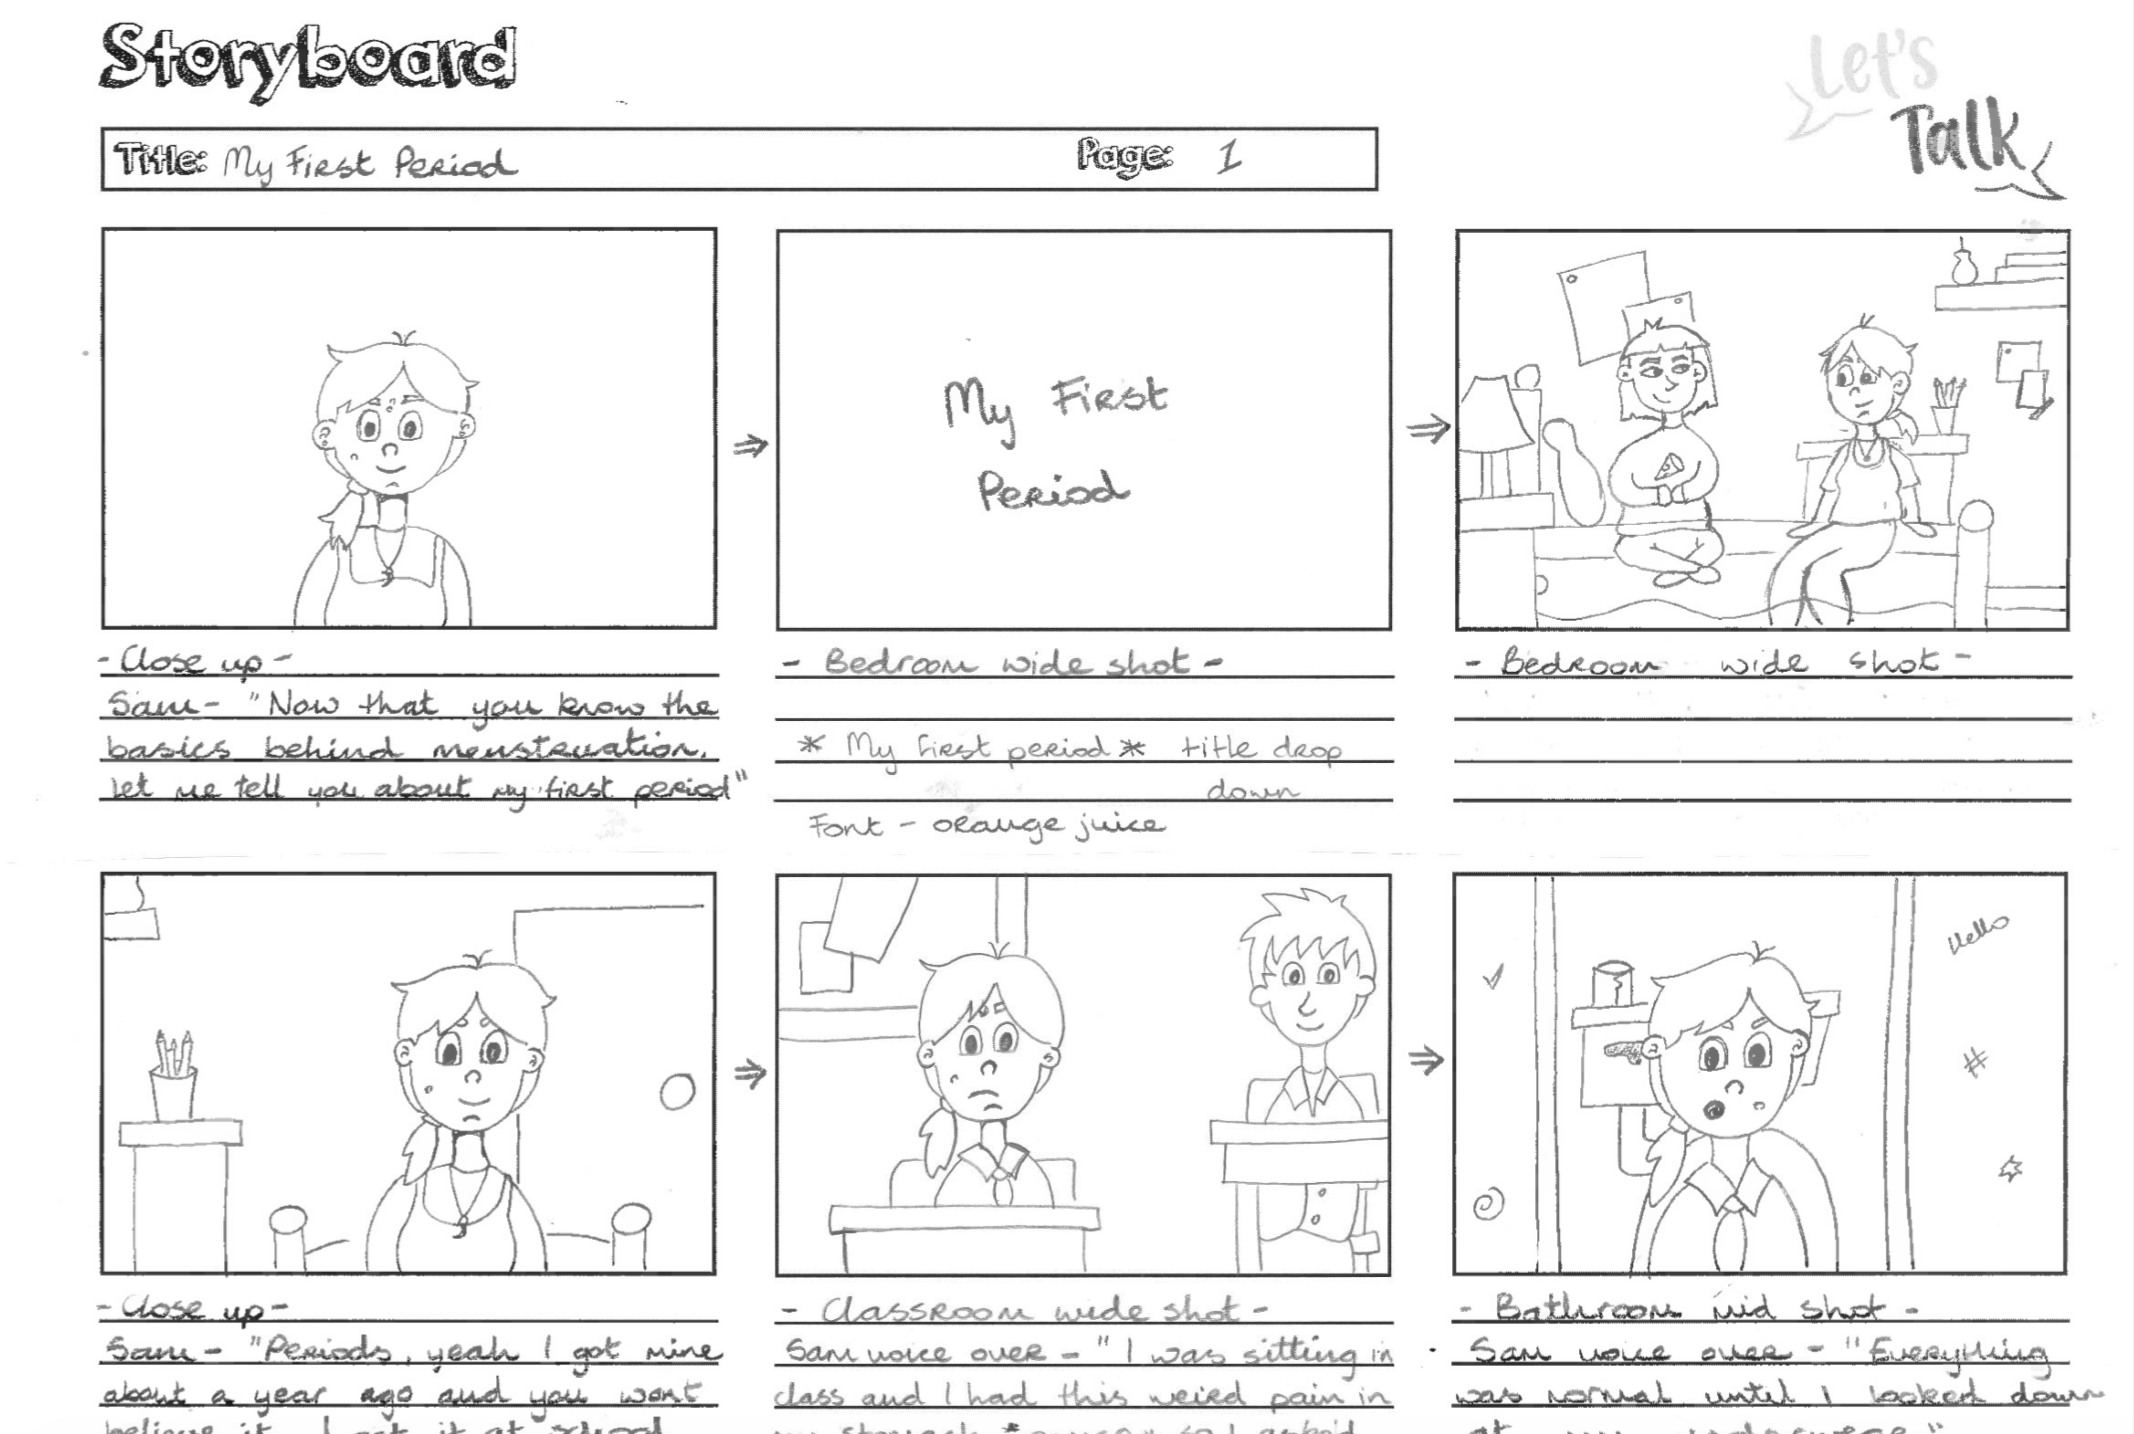
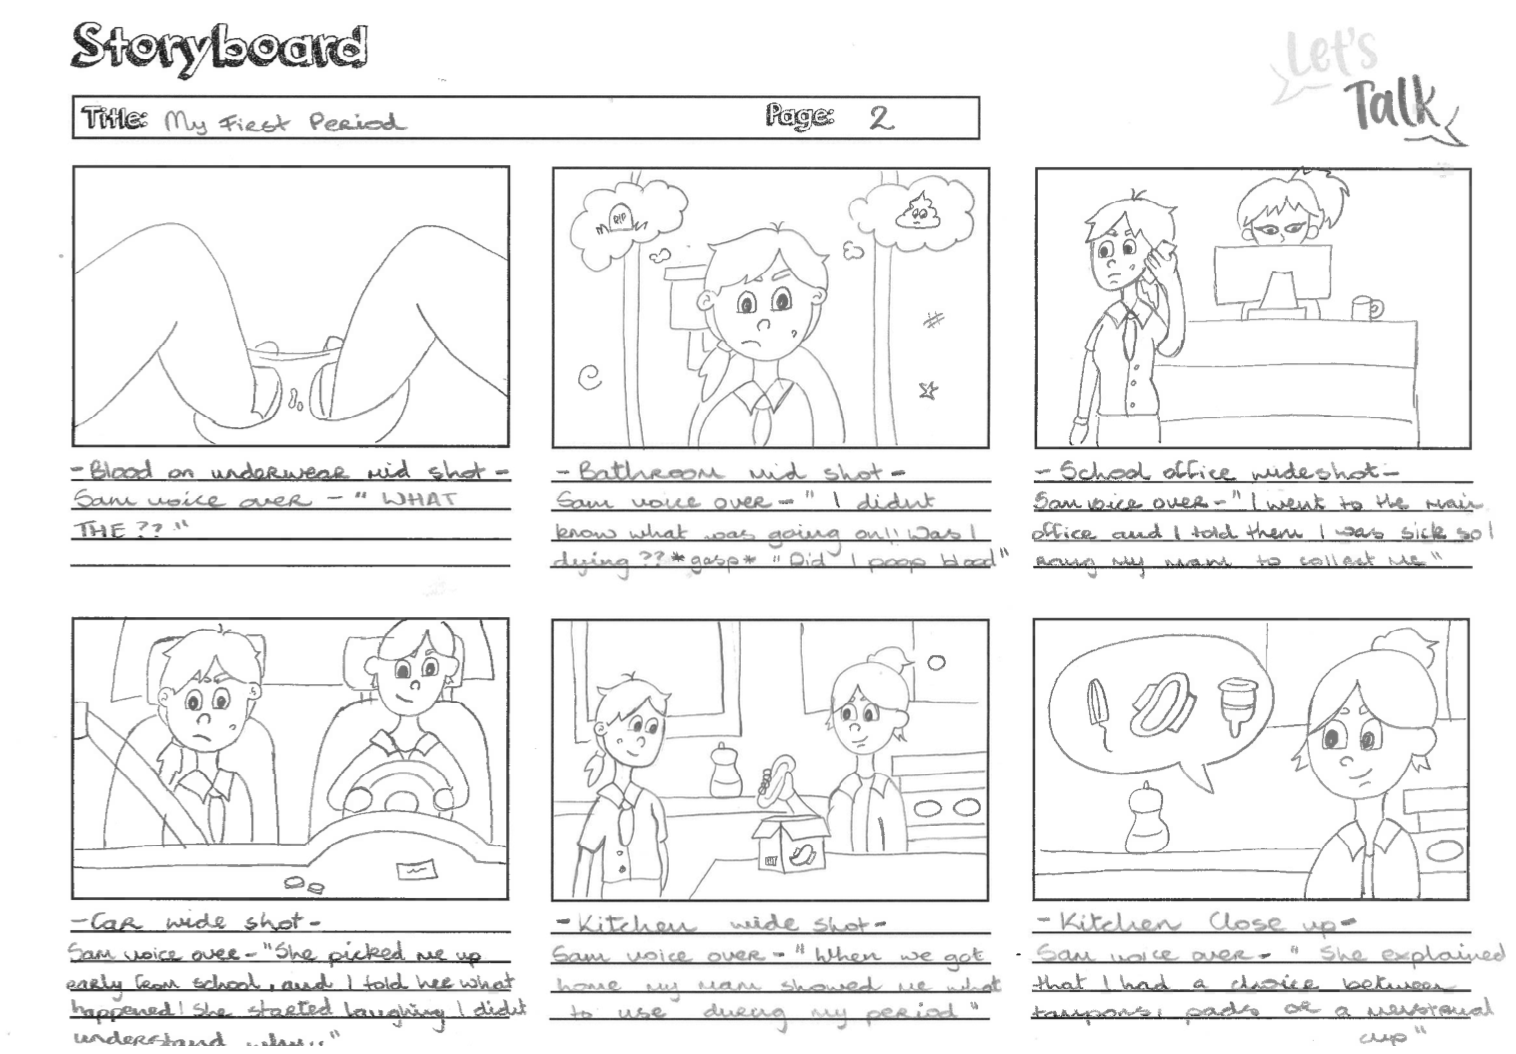
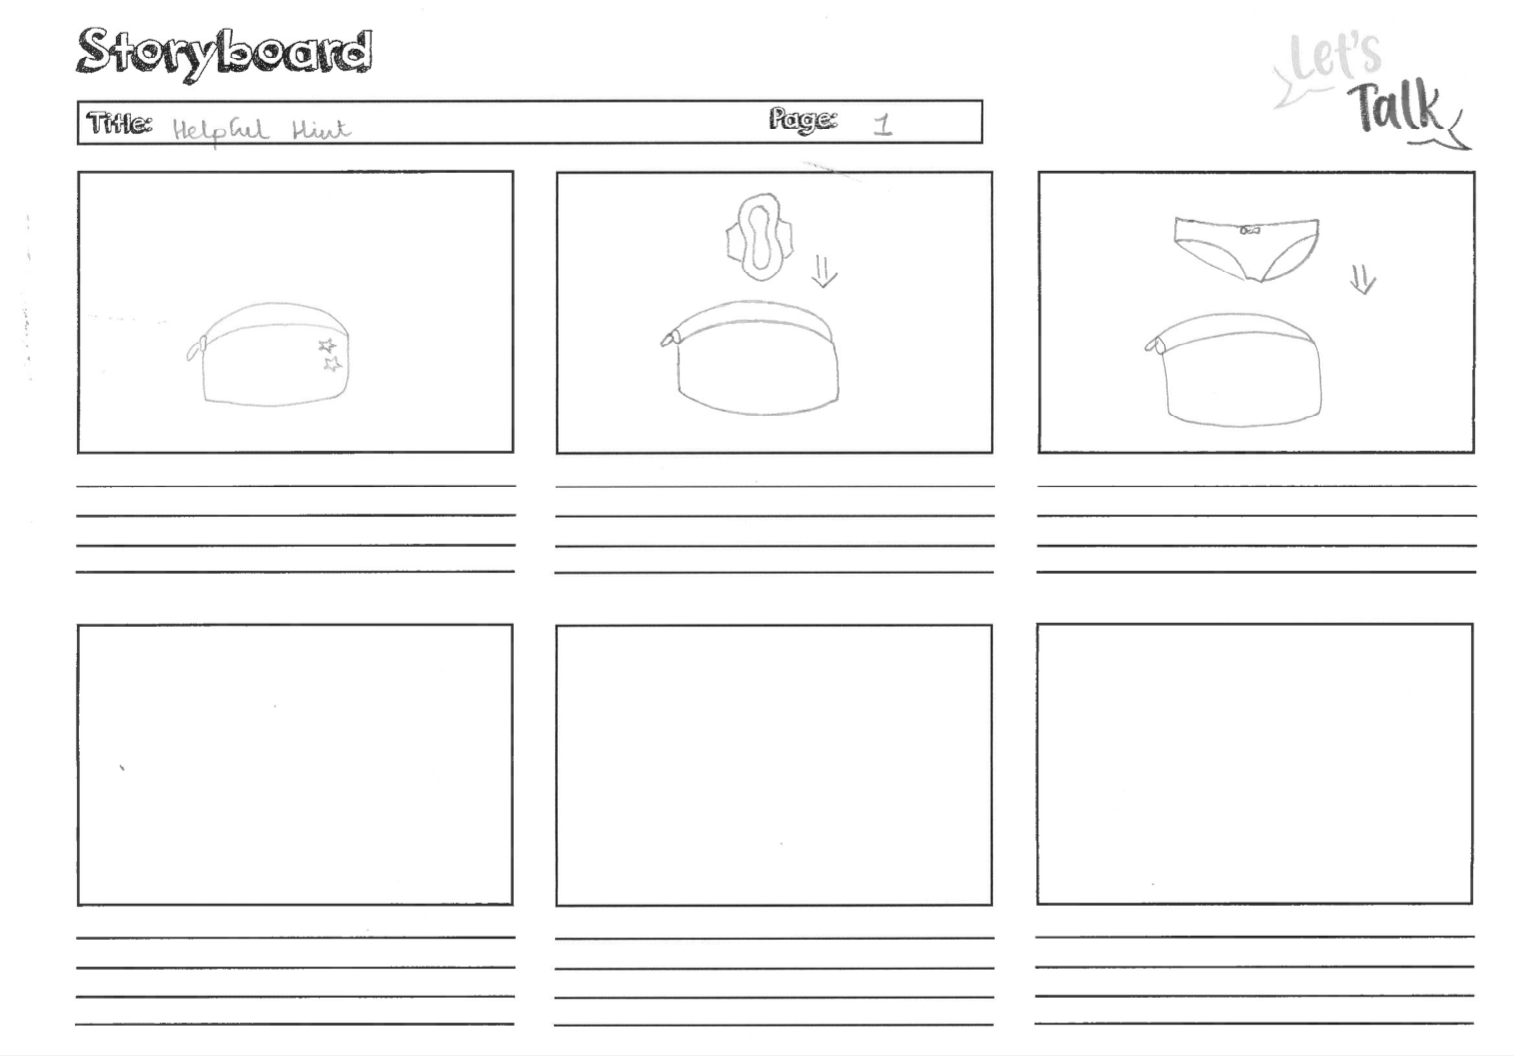
Example of a storyboard:
With any project that included video work it is very important to start off with a solid concept of what a storyboard is used for. “For animators, it would be suicide not to storyboard. Unlike live-action filmmaking, where one shoots scenes in a variety of ways and then finds the final form through the editing process, in animation you never want to execute a finished scene that might be discarded, because this process costs too much time and money. The use of small sketches gives the animator a spectacularly clear and inexpensive way to work out his or her creative vision”. (Laybourne, 1998) The use of a storyboard has been a great benefit to me when I am creating my animations. Having the visual aid makes the creative process run much smoother as it allows you to explain and share your ideas for the video clearly to others. It is helpful when to comes to making the animation because you can use it as a guide so you ensure that you don’t forget any scenes and it helps when putting the video together. It is also handy to shorten the process of creating the video because it gives you a clear vision to how you want it to look so by taking time to draw a good storyboard it will save you time later.
Step 1: Creating a template
The first step in creating a storyboard is creating a template. You can do this by drawing a series of rectangles on paper or downloading a pre made template. Making sure there are lines under the rectangles to write notes or lines from the script. Each rectangle is a different shot or scene.
Step 2: Adding the script
Under the rectangles write out the lines from the script that go with that scene.
Step 3: Sketching out the story
Here you sketch what happened in each scene through drawings, what characters are present and what framing you would like to use. Also making not of what camera angles and movement , transitions between shots and other details that are needed for post production. (Burgess, 2016)
When a script was completed I began creating the storyboard. While drawing the scenes I payed close attention to the placements of the characters, what they were saying and what kind of framing I needed to emulate. I kept in mind my abilities as an animator and what was achievable when using Adobe After Effects and Character Animator.

Burgess, C. (2016). How To Make a Storyboard For Video. [online] Photo & Video Envato Tuts+. Available at: https://photography.tutsplus.com/tutorials/how-to-make-a-storyboard-for-video–cms-26374 [Accessed 20 Mar. 2019].
Laybourne, K. (1998). The Animation Book. New York: Three Rivers Press, pg.100, pg.101. [Accessed 19 Mar. 2019]
Vyond.com. (2018). What Is A Storyboard And Why Do You Need One? | Vyond. [online] Available at: https://www.vyond.com/resources/what-is-a-storyboard-and-why-do-you-need-one/ [Accessed 18 Mar. 2019].
Whitaker, H. and Halas, J. (2002). Timing for animation. Oxford: Elsevier Ltd., p.14. [Accessed 20 Mar. 2019]
Wright, J. (2005). Animation Writing and Development. Burlington: Focal Press, p.201. [Accessed 18 Mar. 2019]
